Indulge in Summer Bliss with Zesty Frozen Yogurt Lemon Cheesecake Bars
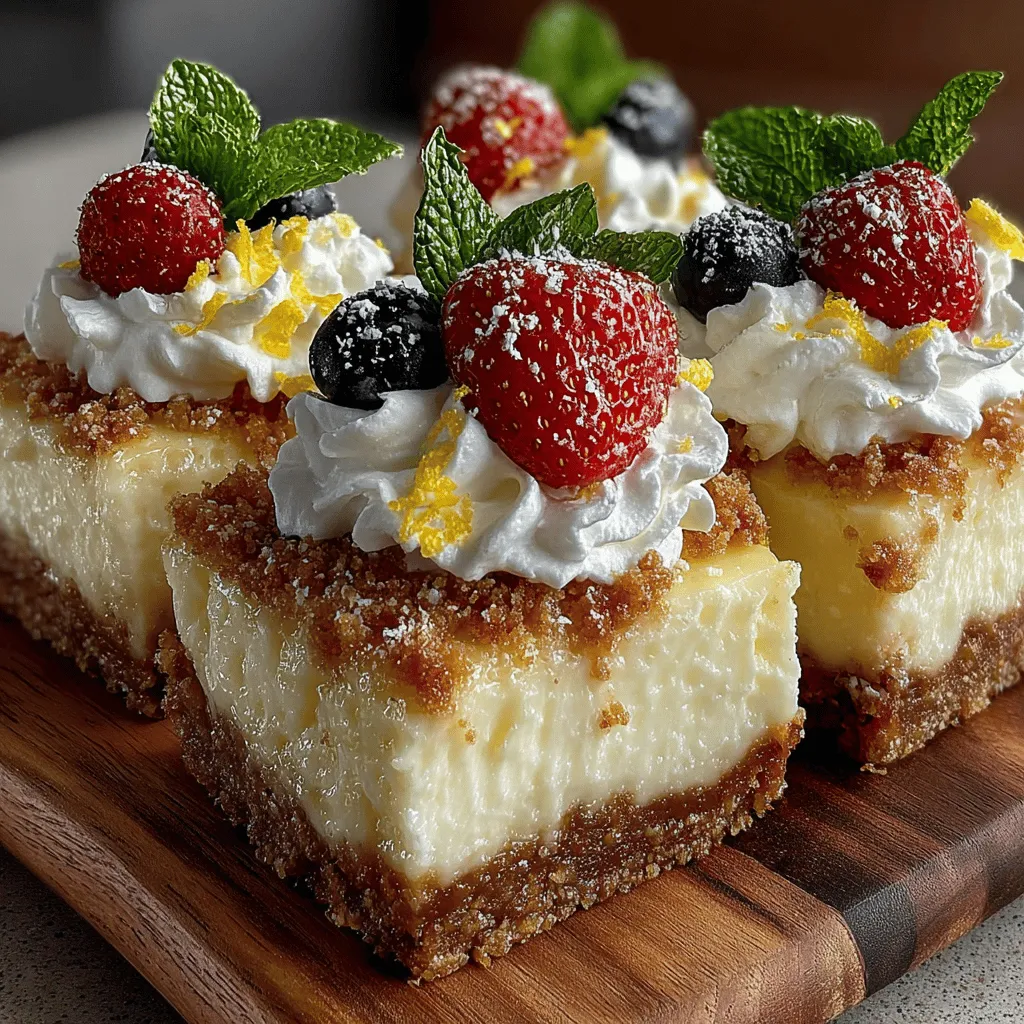
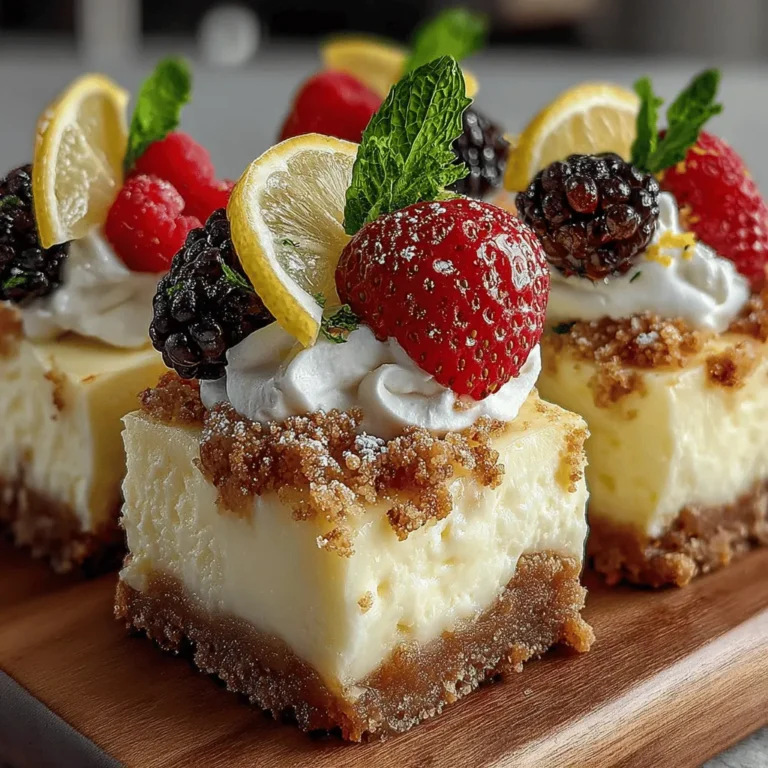
As the sun shines brighter and warmer days beckon, there’s nothing quite like a refreshing dessert to celebrate the season. Enter the Zesty Frozen Yogurt Lemon Cheesecake Bars—an exquisite blend of tangy lemon flavor and creamy cheesecake, all encased in a delightful graham cracker crust. This dessert is not only a feast for the taste buds but also a visual delight, making it the perfect centerpiece for summer gatherings, picnics, or casual family dinners. Combining the richness of traditional cheesecake with the lightness of yogurt, these bars offer a unique twist that is sure to impress.
The origins of cheesecake date back to ancient Greece, where it was served to athletes during the first Olympic Games. Fast forward to today, and cheesecake has evolved into numerous forms and flavors, with the zesty lemon variation being a standout. Lemon cheesecake bars bring a light, refreshing quality that is particularly appealing in the heat of summer. By incorporating yogurt into the filling, the recipe achieves a creamy texture while lowering the calorie count, making it a guilt-free indulgence.
In this article, we will take you through each step of crafting these delightful frozen treats, ensuring that you can replicate the perfect balance of creamy, tangy, and refreshing in your kitchen. Let’s dive into the ingredients that make this recipe a standout.
Understanding the Ingredients
The success of these Zesty Frozen Yogurt Lemon Cheesecake Bars lies in the quality and balance of its ingredients. Each component plays a crucial role in delivering that perfect bite.
*The Crust: A Classic Foundation*
The base of any good cheesecake is its crust, and for these bars, we utilize graham cracker crumbs. The subtle sweetness and slight crunch of the crumbs provide a perfect contrast to the creamy filling. To bind the crust together and enhance its flavor, unsalted butter is a must. Unsalted butter allows you to control the overall saltiness of the dessert, ensuring that the sweet and tangy flavors remain balanced. A touch of granulated sugar is added to the crust mixture to elevate its sweetness, creating a delightful foundation for the rich cheesecake layer.
*The Lemon Cheesecake Filling: Creamy and Zesty*
At the heart of our bars is the luscious lemon cheesecake filling. Cream cheese serves as the primary base, offering that rich, creamy texture that cheesecake lovers crave. To lighten things up, we incorporate plain yogurt, which not only adds a slight tang but also helps create a more airy and refreshing filling. When it comes to lemon flavor, fresh lemon juice is always preferred over bottled juice, as it delivers a brighter and more vibrant taste. Alongside the juice, the addition of lemon zest is essential; it intensifies the citrus flavor and adds a fragrant aroma that elevates the entire dessert.
*The Topping: A Finishing Touch*
To crown our cheesecake bars, a light whipped cream topping brings an extra layer of indulgence. You can choose to use store-bought whipped cream for convenience or whip up your own for a fresher taste. For a pop of color and added flavor, garnishing with fresh berries—such as strawberries, blueberries, or raspberries—completes the dish beautifully.
Step-by-Step Recipe Instructions
Now that we understand the essential components, it’s time to roll up our sleeves and get started on the recipe. Follow these detailed step-by-step instructions to prepare your Zesty Frozen Yogurt Lemon Cheesecake Bars.
*Preparing the Crust: Setting the Base*
1. Preheat the Oven: Begin by preheating your oven to 325°F (163°C). This temperature is ideal for baking the crust to a perfect golden brown while ensuring it doesn’t overcook.
2. Mixing Ingredients for an Even Texture: In a medium-sized bowl, combine 1 ½ cups of graham cracker crumbs, ¼ cup of granulated sugar, and ½ cup of melted unsalted butter. Mix these ingredients thoroughly until the crumbs are evenly coated and the mixture resembles wet sand. This step is crucial for achieving a uniform texture throughout the crust.
3. Baking Tips for Achieving the Right Golden Color: Press the crumb mixture into the bottom of a lined 9×9-inch baking pan, making sure to create an even layer. Use the back of a measuring cup or your fingers to pack it down firmly. Bake the crust in the preheated oven for about 10-12 minutes, or until it turns golden brown. Keep an eye on it to prevent over-baking, as a perfectly baked crust adds to the overall flavor and texture of the bars.
*Making the Lemon Cheesecake Filling: Achieving Creaminess*
1. Techniques for Beating Cream Cheese: While the crust is baking, prepare the lemon cheesecake filling. In a large mixing bowl, beat 16 ounces of softened cream cheese with an electric mixer on medium speed until it is smooth and creamy. This process is essential for eliminating lumps in the filling, ensuring a velvety texture.
2. Proper Incorporation of Ingredients for a Smooth Filling: Gradually add in 1 cup of plain yogurt, ½ cup of granulated sugar, ¼ cup of fresh lemon juice, and the zest of one lemon. Continue to beat the mixture until all ingredients are fully incorporated and the filling is smooth. It’s important to scrape down the sides of the bowl occasionally to ensure everything is well blended.
With these initial steps complete, you are on your way to creating a refreshing dessert that captures the essence of summer. As we move forward in the recipe, we’ll explore how to assemble and freeze these luscious bars, ensuring that each bite is a delightful experience. Stay tuned for the next part, where we will guide you through the final touches and the joy of serving your Zesty Frozen Yogurt Lemon Cheesecake Bars.

Combining Flavors: The Heart of the Recipe
To achieve the perfect Zesty Frozen Yogurt Lemon Cheesecake Bars, combining the flavors correctly is crucial. Start by adding the freshly squeezed lemon juice and zest to your yogurt mixture. Best practices suggest using a microplane for zesting, which allows for the finest texture and maximum flavor release. When mixing, fold in the lemon juice gradually, tasting as you go to ensure you achieve that perfect balance between tartness and sweetness.
Ensuring Even Distribution of Flavors
To ensure an even distribution of flavors throughout the cheesecake filling, use an electric mixer on low speed when incorporating the lemon zest and juice into the yogurt. This method helps maintain the light, airy texture while allowing the zest to disperse evenly. Scrape down the sides of the mixing bowl frequently to make sure no clumps of lemon zest or yogurt are left unmixed. This step ensures that every bite of your cheesecake bars is bursting with zesty goodness.
Baking the Bars: Precision Matters
Once your filling is perfectly combined, it’s time to pour it over the pre-baked crust. Ensure your oven is preheated to the recommended temperature to achieve optimal texture. A typical baking time ranges from 25 to 30 minutes, but keep an eye on the bars as they bake.
Recommended Baking Time for Optimal Texture
For the best results, set your timer for 25 minutes and check for doneness. The cheesecake should be set around the edges but slightly jiggly in the center. This slight jiggle indicates that the bars will firm up perfectly once cooled. Overbaking can lead to a dry texture, so it’s essential to pull them from the oven as soon as they look just about set.
Understanding the Signs of Doneness
To determine whether your cheesecake bars are done, look for a light golden color around the edges, and a smooth, slightly glossy surface. If you gently shake the pan, the center should have a slight wobble—this means the filling is still creamy and not overcooked. Allow the bars to cool completely in the pan before moving on to the next step.
Cooling and Freezing: Perfecting the Texture
Cooling and freezing are critical steps in achieving the perfect texture for your cheesecake bars. After baking, let the bars cool on the countertop for about 30 minutes. This cooling period allows the bars to set and reduces the risk of condensation forming in the freezer, which can lead to a soggy texture.
Importance of Cooling Before Freezing
Once cooled to room temperature, transfer the pan to the refrigerator for at least two hours. This step not only helps the bars firm up but also enhances the flavors as they meld together. After the chilling period, cover the pan tightly with plastic wrap or aluminum foil before placing it in the freezer. This ensures that the flavors remain intact and prevents freezer burn.
Tips for Storing in the Freezer
For optimal freshness, consume your cheesecake bars within 2-3 weeks after freezing. When ready to serve, remove only the amount you plan to enjoy, and return the rest to the freezer immediately. To thaw, simply transfer the bars to the refrigerator for about an hour or let them sit at room temperature for 10-15 minutes before slicing.
Serving Suggestions
When it comes to serving your Zesty Frozen Yogurt Lemon Cheesecake Bars, presentation can elevate the entire experience.
How to Present Your Cheesecake Bars for Maximum Appeal
Cut the bars into uniform squares or rectangles for a polished look. Arrange them on a decorative platter, and consider using parchment paper underneath for an elegant touch. For an added visual appeal, serve them alongside fresh berries or a dollop of whipped cream.
Garnishing: Elevate Your Presentation
Creative garnishing can make your cheesecake bars even more inviting.
Creative Ways to Use Lemon Zest
One simple yet effective way to elevate your presentation is by sprinkling additional lemon zest over the top of the bars just before serving. This not only adds a pop of color but also enhances the citrus aroma, enticing your guests even more.
Choosing the Right Berries for Garnish
Fresh berries can provide a burst of color and flavor that complements the zesty lemon filling. Consider using blueberries, raspberries, or strawberries. For a more sophisticated presentation, arrange the berries in a fan shape or scatter them artfully around the bars on the serving platter.
Serving Temperature: Enhancing the Experience
The temperature at which you serve your cheesecake bars can greatly affect their taste and texture.
Ideal Waiting Time Before Slicing
After removing the bars from the freezer, allow them to sit at room temperature for about 10-15 minutes before slicing. This waiting period will soften the filling slightly, making it easier to cut through while preserving that creamy texture.
Best Practices for Serving Frozen Desserts
When serving frozen desserts like these cheesecake bars, consider offering a selection of toppings on the side, such as whipped cream, chocolate sauce, or fresh fruit. This allows guests to customize their dessert experience and adds an interactive element to the serving process.
Nutritional Benefits of Key Ingredients
Understanding the health aspects of the ingredients in your Zesty Frozen Yogurt Lemon Cheesecake Bars can make your dessert feel even more rewarding.
Health Benefits of Yogurt
Yogurt, especially Greek yogurt, is a powerhouse of nutrition. It is rich in probiotics, which promote digestive health and can boost your immune system. Greek yogurt, in particular, contains more protein and less sugar than regular yogurt, making it a healthier choice. This means that while you indulge in these delicious cheesecake bars, you are also providing your body with essential nutrients.
Benefits of Lemons
Lemons are not just a flavor enhancer; they are also packed with health benefits. A single lemon provides a significant amount of vitamin C, which is vital for immune function and skin health. Additionally, lemons are rich in antioxidants that help combat oxidative stress in the body, supporting overall health. Incorporating lemons into this dessert not only brightens the flavor but also contributes to a nutritious treat.
Conclusion
Zesty Frozen Yogurt Lemon Cheesecake Bars are a delightful addition to any dessert table, offering a refreshing taste of summer in every bite. With a creamy filling, a buttery crust, and the tangy brightness of lemons, these bars are not only easy to make but also a healthier alternative to traditional desserts. Enjoy them at your next gathering or as a sweet treat for yourself.
With this recipe, you have all the tools and knowledge to create a dessert that will not only satisfy your sweet tooth but also impress your guests. Embrace the joy of baking and the pleasure of sharing delicious homemade treats. These cheesecake bars are not just a dessert; they are a celebration of flavors and a testament to the joy of cooking. Enjoy every moment of creating and sharing these delightful treats!


