

Introduction to Velvety Bliss: Classic Red Velvet Cupcakes
Red velvet cupcakes have become a quintessential dessert for celebrations, embodying a perfect blend of visual appeal and delectable taste. With their striking crimson color and rich, chocolatey flavor, these cupcakes capture the essence of festivity, making them a popular choice for birthdays, weddings, and holidays alike. The allure of red velvet lies not just in its looks; it’s the marriage of flavors and textures that truly makes it special. Topped with a luscious cream cheese frosting, these cupcakes offer a delightful contrast of tangy sweetness against the moist cake, creating a memorable experience in every bite.
The origins of red velvet cake can be traced back to the early 20th century, with roots in the Southern United States. Traditionally, this cake was known for its soft, velvety texture and its unique combination of cocoa powder and buttermilk, which imparted a subtle richness and a tender crumb. Over time, red velvet transitioned from a simple cake to a beloved dessert, often adorned with cream cheese frosting, which enhances the flavor and adds a creamy finish. Today, red velvet cupcakes have gained widespread popularity, allowing home bakers to recreate this classic dessert in individual portions, perfect for sharing or indulging.
In this article, we will delve into the art of making classic red velvet cupcakes, providing you with a thorough guide that covers everything from ingredient selection to essential baking tips and frosting techniques. Whether you are a seasoned baker or a novice in the kitchen, this recipe will help you create red velvet cupcakes that are not only beautiful but also incredibly delicious.
Understanding the Ingredients
To achieve the perfect red velvet cupcake, it’s essential to understand the role of each ingredient in the recipe. Here’s a breakdown of the key components that contribute to the texture and taste of these delightful treats:
– All-Purpose Flour: This ingredient serves as the backbone of the cupcake, providing structure and texture. The right amount of flour ensures that the cupcakes rise properly while maintaining a tender crumb.
– Granulated Sugar: Sugar adds sweetness to the cupcakes and plays a crucial role in moisture retention. The right amount of sugar also helps create a beautiful golden crust on the outside while keeping the inside soft and fluffy.
– Baking Soda and Salt: These are essential for leavening the cupcakes. Baking soda reacts with the acidic ingredients (like buttermilk and vinegar), helping the cupcakes rise. Salt enhances the overall flavor, balancing the sweetness.
– Cocoa Powder: This ingredient contributes a subtle chocolate flavor without overshadowing the signature red color. It is important to choose unsweetened cocoa powder to ensure the right flavor profile.
– Vegetable Oil: Unlike butter, vegetable oil keeps the cupcakes moist and tender. The fat from the oil coats the flour proteins, resulting in a delicate crumb and preventing the cupcakes from becoming dry.
– Buttermilk: Adding buttermilk is key to a successful red velvet cupcake. The acidity helps to activate the baking soda, resulting in a lighter texture, while also imparting a slight tanginess that enhances the overall flavor.
– Eggs: Eggs bind the ingredients together and add richness to the batter. They also contribute to the leavening process, helping the cupcakes rise.
– Red Food Coloring: The hallmark of red velvet cupcakes is the vibrant hue achieved through red food coloring. It’s essential to use the right amount to ensure a visually appealing result without altering the flavor.
– Vanilla Extract and White Vinegar: Vanilla extract adds depth to the flavor profile, while white vinegar works in tandem with baking soda to create a light, airy texture.
Step-by-Step Guide to Making Red Velvet Cupcakes
Before you embark on the baking journey, it’s crucial to prepare your kitchen for success. A well-organized workspace will streamline the process and reduce the likelihood of errors.
– Importance of Preheating the Oven: Start by preheating your oven to the recommended temperature specified in the recipe. This step is vital to ensure that your cupcakes rise properly and bake evenly. An adequately heated oven also helps achieve the desired texture and color.
– Choosing the Right Muffin Tin and Cupcake Liners: Selecting a standard muffin tin and high-quality cupcake liners will make the baking process smoother. The liners not only help with easy removal but also prevent the cupcakes from sticking, ensuring a beautiful presentation.
Once your kitchen is prepped, the next step involves mixing the dry ingredients.
– Mixing the Dry Ingredients: Begin by sifting the all-purpose flour, cocoa powder, baking soda, and salt together in a bowl. Sifting is crucial as it aerates the flour, resulting in a lighter texture for your cupcakes. Each dry ingredient plays its part; the flour provides structure, the cocoa powder adds flavor, the baking soda facilitates leavening, and the salt enhances the overall taste.
After preparing the dry ingredients, it’s time to create the wet mixture.
– Creating the Wet Mixture: In a separate bowl, combine the vegetable oil, granulated sugar, buttermilk, eggs, vanilla extract, and red food coloring. Whisk these ingredients together until you achieve a smooth and consistent mixture. Using room temperature ingredients is essential, as it aids in better mixing and results in a uniform batter.
– Combining Dry and Wet Ingredients: Carefully add the dry mixture to the wet ingredients, stirring gently until just combined. Be cautious not to overmix, as this can lead to dense cupcakes. The goal is to create a smooth batter with a few small lumps remaining, which indicates that the ingredients are well incorporated without overworking the gluten.
– Filling the Cupcake Liners: Once your batter is ready, it’s time to fill the cupcake liners. Use an ice cream scoop or a measuring cup to pour the batter into each liner, filling them about two-thirds full. This allows room for the cupcakes to rise without overflowing.
By following these initial steps, you’ll be well on your way to creating your very own batch of classic red velvet cupcakes. The process is straightforward, and with a little patience and attention to detail, you’ll soon have a tray of deliciously decadent treats ready for frosting and, ultimately, for enjoying.
Using an Ice Cream Scoop for Consistency
To ensure uniformity in your red velvet cupcakes, using an ice cream scoop is highly recommended. This versatile kitchen tool allows you to measure out the batter precisely, ensuring that each cupcake is the same size and bakes evenly. When scooping, fill the scoop about three-quarters full to allow for proper rising without overflowing during baking. This method not only leads to aesthetically pleasing cupcakes but also makes for a more enjoyable eating experience, as everyone gets a consistent taste and texture.
Ensuring Even Baking with Proper Filling Techniques
Proper filling techniques are essential in achieving evenly baked cupcakes. Start by lining your muffin tin with paper liners to help with easy removal after baking. When filling each liner, aim for the three-quarters full guideline. This helps the cupcakes rise perfectly without spilling over the edges. If you fill them too much, they can become misshapen and difficult to frost. Conversely, under-filling will result in cupcakes that are too small and not as delightful as you’d like.
Baking the Cupcakes
With the batter scooped and the liners filled, it’s time to bake your red velvet cupcakes.
Ideal Baking Times and Techniques for Testing Doneness
Preheat your oven to 350°F (175°C) before placing the cupcake tray inside. Bake the cupcakes for approximately 18-20 minutes, but keep an eye on them as baking times can vary depending on your oven. To test for doneness, insert a toothpick into the center of a cupcake; if it comes out clean or with a few moist crumbs, they are ready to be removed. If the toothpick has wet batter on it, give them another couple of minutes before checking again.
Understanding Oven Variances for Perfect Results
Every oven is unique, which can affect baking times and temperatures. Some may run hotter or cooler than indicated. For best results, consider investing in an oven thermometer to monitor the actual temperature inside your oven. It can also be beneficial to rotate your cupcake pan halfway through baking to ensure even heat distribution. This adjustment can help counteract any hot spots in your oven, leading to perfectly baked red velvet cupcakes every time.
Cooling and Frosting the Cupcakes
Once the cupcakes are out of the oven, it’s vital to cool them properly before frosting.
Best Practices for Cooling to Prevent Sogginess
Allow the cupcakes to cool in the pan for about 5-10 minutes before transferring them to a wire rack. This initial cooling helps them set without becoming too soggy. After removing them from the pan, place them upright on the wire rack to allow air to circulate around all sides. This cooling method prevents moisture from collecting underneath, ensuring that your cupcakes stay light and fluffy.
Techniques for Smooth and Creamy Frosting Application
When it comes to frosting, timing is everything. Wait until the cupcakes are completely cool—this can take about 30 minutes. If you frost them while they are still warm, the frosting may melt, ruining the texture and presentation. Once cooled, you can apply the frosting using a spatula or a piping bag. For a clean and smooth application, a spatula works well, while a piping bag allows for more decorative designs that can elevate the appearance of your cupcakes.
Crafting the Cream Cheese Frosting
The star of your red velvet cupcakes is undoubtedly the cream cheese frosting. Here’s how you can create the perfect frosting to complement your cupcakes.
Ingredients Breakdown for the Frosting
The Balance of Cream Cheese and Butter
For the cream cheese frosting, you will need an 8-ounce package of cream cheese at room temperature and 1/2 cup of unsalted butter, also at room temperature. The combination of these two ingredients creates a rich and creamy base that balances the sweetness of the frosting. The cream cheese adds a slight tanginess that enhances the overall flavor profile of your red velvet cupcakes.
How Powdered Sugar Affects Texture and Sweetness
You will also need about 4 cups of powdered sugar for sweetness and texture. Powdered sugar dissolves quickly, giving the frosting a smooth consistency. The amount of sugar can be adjusted according to your desired sweetness. Keep in mind that too little sugar may result in a runny frosting, while too much can make it overly sweet.
Mixing the Frosting to Perfection
Tips for Achieving the Right Consistency
Begin by creaming together the softened cream cheese and butter in a mixing bowl until it’s light and fluffy. This process typically takes about 2-3 minutes on medium speed. Gradually add the powdered sugar, one cup at a time, mixing on low speed to avoid a sugar cloud. After all the sugar is incorporated, add a splash of milk if the frosting is too thick, or mix in additional powdered sugar if it’s too runny. The goal is a smooth, spreadable frosting that holds its shape without being overly stiff.
Flavor Enhancements with Vanilla Extract
For an extra layer of flavor, add 1 teaspoon of pure vanilla extract to the frosting mixture. This will enhance the overall taste, making your frosting more aromatic and delicious. Mix well until the vanilla is evenly distributed throughout the frosting.
Frosting Techniques for Presentation
Using a Spatula vs. Piping Bag
When frosting your cupcakes, you can choose between a spatula for a rustic look or a piping bag for a more polished finish. If using a spatula, simply dollop a generous amount of frosting on top and spread it in a circular motion for a lovely swirl. If you opt for a piping bag, fill it with the prepared frosting, and use a large star or round tip to pipe decorative swirls on each cupcake.
Creative Ideas for Decorative Finishes
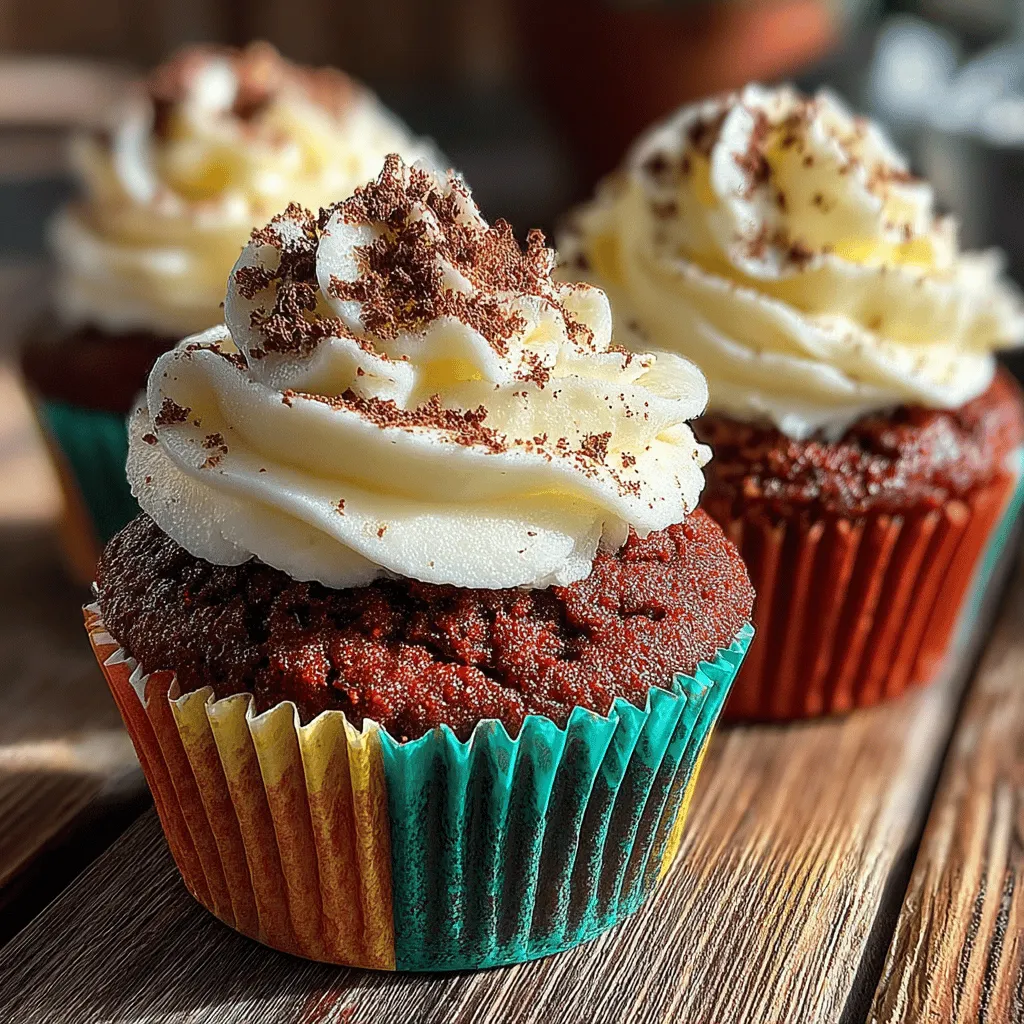
To elevate your red velvet cupcakes even further, consider adding garnishes such as chocolate shavings, sprinkles, or even a dusting of cocoa powder. Fresh berries or edible flowers can also add a pop of color and an elegant touch. These small details can transform your cupcakes from simple treats to stunning desserts that are perfect for any occasion.
Serving and Enjoying Your Red Velvet Cupcakes
Presentation Tips for Special Occasions
When serving your red velvet cupcakes, presentation is key. Consider placing them on a tiered cake stand for a striking display, or arrange them on a decorative platter. You can also use cupcake toppers or themed decorations that match your event, such as wedding or birthday motifs, to create a festive atmosphere.
Creative Garnishes to Enhance Visual Appeal
To enhance visual appeal, think about garnishing each cupcake with a small dollop of additional frosting, topped with a piece of chocolate or a bright berry. This not only looks beautiful but also invites your guests to indulge in the deliciousness of the cupcake.
Pairing Suggestions with Beverages
Pair your red velvet cupcakes with a variety of beverages to complement their rich flavor. A glass of cold milk is a classic choice, while a cup of coffee or a creamy latte can balance the sweetness of the frosting beautifully. For a more indulgent experience, serve them with a dessert wine or a sweet sparkling wine, which can elevate the flavors even further.
Storing Leftover Cupcakes
Best Practices for Keeping Cupcakes Fresh
If you find yourself with leftover cupcakes, it’s crucial to store them properly to maintain their freshness. Place the cupcakes in an airtight container at room temperature for up to three days. If you live in a particularly warm or humid environment, it’s best to refrigerate them to prevent spoilage. Just be sure to bring them back to room temperature before serving so that the frosting and cake regain their ideal texture.
How to Freeze Cupcakes for Future Enjoyment
For longer storage, freezing is an excellent option. To freeze your red velvet cupcakes, first ensure they are completely cooled. Place them in a single layer on a baking sheet and freeze for about an hour until solid. Then, transfer them to a freezer-safe container or zip-top bag, layering parchment paper between the cupcakes to prevent sticking. They can be frozen for up to three months. When you’re ready to enjoy them, simply thaw them in the fridge overnight and frost them fresh.
Conclusion: The Joy of Baking Red Velvet Cupcakes
Baking classic red velvet cupcakes is not just about creating a delicious dessert; it’s also an opportunity to share joy with family and friends. The combination of moist cake and creamy frosting is sure to impress any crowd. By following this comprehensive guide, you can master the art of red velvet cupcakes and enjoy the process of baking as much as the final product. Whether for a birthday celebration or a cozy afternoon treat, these cupcakes are sure to bring a smile to everyone’s face. So, preheat your oven, gather your ingredients, and get ready to delight in the velvety bliss of these classic treats.
