
Cheesy Salsa Chicken Quesadilla Bake: A Comfort Food Delight
There’s something incredibly comforting about a warm, cheesy quesadilla fresh from the oven. It evokes fond memories of my childhood, where every Friday night was a mini fiesta in our household. My mom would whip up her famous quesadillas, filling them with everything from leftover chicken to beans and, of course, loads of cheese. Fast forward to today, and I find myself recreating those vibrant flavors but with a twist: enter the Cheesy Salsa Chicken Quesadilla Bake!
This dish is a perfect blend of convenience and flavor, ideal for busy weeknights or laid-back weekends. With its gooey cheese, zesty salsa, and tender chicken, it’s no wonder this recipe has become a staple in my home. The Cheesy Salsa Chicken Quesadilla Bake takes the classic quesadilla and transforms it into an easy, oven-baked version that serves as a hearty meal for the whole family. Not only is it delicious, but it also allows for creativity in the kitchen, as you can easily adapt the ingredients to suit your tastes or dietary preferences.
What makes this dish particularly appealing is its versatility. You can customize it based on what you have in your pantry or what flavors you enjoy most. Whether you prefer spicy jalapeños for a kick, creamy avocado for richness, or even a sprinkle of lime juice for a fresh finish, the choices are endless. Moreover, it’s an excellent way to use up leftover ingredients, making it a budget-friendly option for those looking to minimize food waste.
Gathering the Ingredients
Before we dive into the preparation, let’s talk about what you’ll need for this Cheesy Salsa Chicken Quesadilla Bake. The ingredients are not only simple but also easily adaptable to suit your taste.
– Cooked Chicken: Start with shredded rotisserie chicken for convenience, which is a lifesaver here. Alternatively, you can use leftover chicken or poach your own for a fresher option.
– Salsa: Choose your favorite salsa—mild or spicy. A chunky salsa adds texture and richness, enhancing the overall flavor profile of the dish.
– Corn: Canned or frozen corn works perfectly; just ensure to thaw the frozen variety before mixing it into the filling.
– Black Beans: Rinse and drain your black beans to remove any excess sodium and prepare them for incorporation into the mix.
– Shredded Mexican Cheese Blend: This melty cheese blend is the star of the show, providing that gooey texture we all love. Feel free to substitute with cheddar or Monterey Jack if that’s what you have on hand; just be mindful of the flavor profile each cheese brings.
– Flour Tortillas: Large tortillas hold everything together beautifully, but you could also use smaller ones if you prefer bite-sized portions for an appetizer-style dish.
– Spices: Ground cumin, garlic powder, and onion powder add depth of flavor to the filling, making every bite a delightful experience.
– Olive Oil: A little oil for cooking the quesadillas until they are perfectly golden brown adds a nice touch of crispiness to the dish.
– Fresh Cilantro: This herb adds a burst of freshness and vibrant color as a garnish, elevating the presentation of your Cheesy Salsa Chicken Quesadilla Bake.
Now that we have our ingredients lined up, let’s get started on the initial steps of preparing this mouthwatering dish.
Preparation Steps
1. Preheat the Oven: Begin by preheating your oven to 375°F (190°C). This step is crucial for ensuring that your quesadilla bake comes out evenly cooked and golden brown.
2. Prep the Chicken: If you’re using a rotisserie chicken, shred the meat into bite-sized pieces. If you’re poaching your own chicken, bring a pot of water to a simmer, add the chicken breasts, and cook for about 15-20 minutes until fully cooked. Once done, shred the chicken with two forks or chop it with a knife.
3. Mix the Filling: In a large mixing bowl, combine the shredded chicken, your choice of salsa, corn, black beans, and a generous amount of the shredded cheese. Sprinkle in the ground cumin, garlic powder, and onion powder, and mix everything together until well combined. This mixture will be the heart of your quesadilla bake, so ensure that the flavors meld together harmoniously.
4. Assemble the Quesadilla Layers: Grease a large baking dish with olive oil to prevent sticking. Begin by laying down a tortilla to form the base. Spread a portion of your filling mixture evenly over the tortilla, then add another layer of cheese on top. Top it with another tortilla to create a quesadilla layer. Repeat this process until you’ve used up all your filling and tortillas, finishing with a layer of cheese on top to ensure a beautifully melted topping.
5. Bake It Up: Place the assembled quesadilla bake in the preheated oven. Bake for about 25-30 minutes or until the top is bubbly and golden brown. The aroma that fills your kitchen during this time will have everyone eagerly awaiting dinner!
As your Cheesy Salsa Chicken Quesadilla Bake bakes, prepare for the delightful transformation of the ingredients into a cohesive, comforting dish that brings back memories while creating new ones. Whether served as a weeknight dinner or a weekend gathering dish, this recipe is sure to please and satisfy.
In the next part of the article, we will explore serving suggestions, potential variations, and tips for perfecting your Cheesy Salsa Chicken Quesadilla Bake. Stay tuned for more delicious insights!
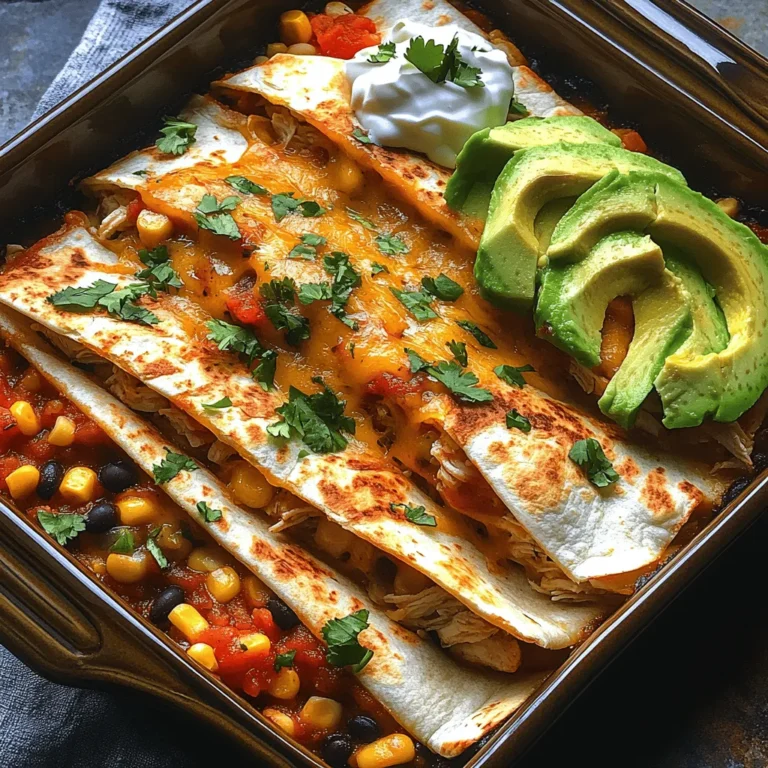
Sour Cream and Avocado
No quesadilla bake is complete without the perfect toppings, and sour cream and avocado are the dynamic duo that will elevate your Cheesy Salsa Chicken Quesadilla Bake to the next level. The creamy texture of sour cream complements the zestiness of the salsa, while fresh avocado adds a rich, buttery flavor that balances the dish beautifully.
For the best experience, serve the sour cream chilled and consider adding a squeeze of lime for an extra zing. Slice a ripe avocado into wedges or mash it with a fork and sprinkle a little salt and lime juice over it to enhance its flavor. Both toppings not only enhance the aesthetics but also provide a delightful contrast to the warm, cheesy quesadillas.
Preparing the Quesadilla Filling
Now that your toppings are prepared, it’s time to create the sensational filling that makes these quesadillas so irresistible. In a large mixing bowl, combine the following ingredients:
– Shredded Chicken: Using rotisserie chicken saves time and adds deep flavor.
– Salsa: Choose your favorite salsa, whether mild, medium, or spicy, to suit your taste.
– Corn: Canned or frozen corn works well; it adds sweetness and texture.
– Black Beans: Rinsed and drained black beans contribute protein and fiber.
– Shredded Cheese: Use a blend of Monterey Jack and cheddar for maximum flavor.
– Ground Cumin: This spice adds warmth and an earthy flavor.
– Garlic Powder and Onion Powder: These seasonings enhance the overall taste.
Mix these ingredients until well combined. As you stir, the vibrant colors of the corn and salsa will create a visually appealing mixture, and the irresistible aroma of the spices will fill your kitchen. Resist the temptation to taste just yet; there’s more to come!
Assembling the Quesadillas
With the filling ready, it’s time to bring your quesadillas to life. Prepare a clean surface or a cutting board for assembly. Take your flour tortillas and lay them out flat. For each quesadilla, take about half a cup of the chicken mixture and spread it evenly over one half of the tortilla.
Fold the other half of the tortilla over the filling, creating a half-moon shape. This simple folding technique not only keeps the filling contained but also makes it easy to handle while cooking. Repeat this process for all the tortillas until you have a stack of deliciously filled quesadillas, ready to be cooked.
Cooking the Quesadillas
Heat a tablespoon of olive oil in a large skillet over medium heat. It’s essential to get the pan hot enough to ensure a good sear on the quesadillas. Once the oil is shimmering, add the folded quesadillas to the skillet, cooking them one at a time.
Cook each quesadilla for about 2-3 minutes on one side until it turns golden brown and crispy. Carefully flip it over and cook for an additional 2-3 minutes on the other side. You want the cheese inside to melt thoroughly, so keep an eye on them. Avoid overcrowding the pan, as each quesadilla deserves its moment to shine. The goal is to achieve a crispy exterior with a warm, gooey center.
Layering in the Baking Dish
After cooking, transfer the quesadillas to a greased 9×13 inch baking dish. If they don’t fit perfectly, don’t worry; you can cut them into halves or quarters to make them fit snugly. This step not only makes serving easier but also allows for more cheesy goodness to be layered on top.
As you layer the quesadillas in the baking dish, try to create an appealing arrangement. You can place them side by side or in a staggered pattern. This way, every piece will have an equal share of the delicious toppings that follow.
Adding the Finishing Touches
Now comes the fun part: adding the finishing touches! Generously sprinkle the remaining shredded cheese over the top of the assembled quesadillas. This is where the magic truly happens! As the quesadilla bake cooks, this cheese will melt into a beautiful, bubbly layer that’s simply irresistible.
For an extra layer of flavor, consider adding sliced jalapeños or olives on top of the cheese if you enjoy a little heat or brininess. Feel free to customize your topping choices based on your preferences.
Baking to Perfection
Preheat your oven to 375°F (190°C) and slide the baking dish in once it’s ready. Let the quesadilla bake in the oven for 15-20 minutes. Keep an eye on it; you want the cheese to be bubbly and slightly golden, but not burnt.
As it bakes, the aroma wafting from your oven will have everyone eagerly awaiting dinner! The combination of melting cheese and the savory filling will create an enticing scent that fills your home.
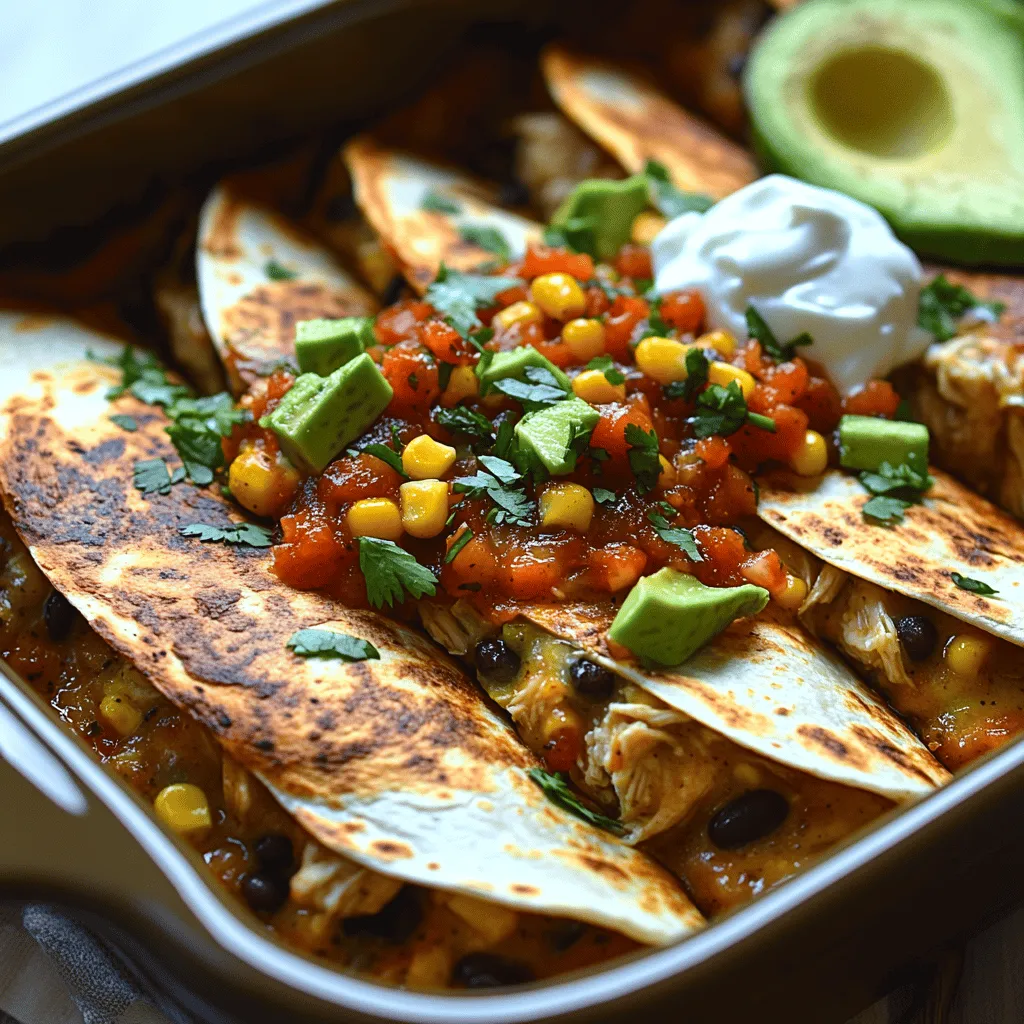
Garnishing and Serving
Once the quesadilla bake is out of the oven, allow it to rest for a few minutes before serving. This resting period allows the cheese to set slightly, making it easier to slice and serve.
For a beautiful presentation, garnish with freshly chopped cilantro for a pop of color and flavor. The bright green herb adds a fresh note that complements the rich flavors of the quesadilla bake.
To serve, slice the quesadilla bake into squares or triangles and arrange them on a platter. Offer sour cream and avocado slices on the side for dipping. The creamy toppings will help cool down any heat from the salsa while adding a delightful richness to each bite.
Tips for Best Results
– Choose Quality Tortillas: Opt for fresh, high-quality flour tortillas to ensure a soft yet crispy texture after baking.
– Experiment with Fillings: Feel free to mix and match ingredients! Add bell peppers, onions, or even spinach for a veggie boost.
– Don’t Skip the Cheese: Using a combination of cheeses can elevate the flavor; consider adding pepper jack for a spicy kick.
– Adjust Spice Levels: Customize the spiciness of your quesadilla bake by using different types of salsa or adding fresh chilies.
– Make Ahead: This dish can be assembled ahead of time and stored in the refrigerator until you’re ready to bake it. Just ensure you add a few extra minutes to the baking time if it goes in cold.
Common Questions About Cheesy Salsa Chicken Quesadilla Bake
Can I use leftover chicken for this recipe?
Absolutely! Leftover rotisserie chicken is perfect for this dish. You can also use any cooked chicken you have on hand.
Can I make this recipe vegetarian?
Yes! Substitute the chicken with additional beans, grilled vegetables, or even sautéed mushrooms for a delicious vegetarian version.
How do I store leftovers?
Store any leftovers in an airtight container in the refrigerator for up to three days. Reheat in the oven or microwave before serving.
Can I freeze the quesadilla bake?
Yes, you can freeze the assembled quesadilla bake before baking. Wrap it tightly in plastic wrap and aluminum foil and freeze for up to three months. When ready to cook, thaw it in the refrigerator overnight before baking.
Conclusion
The Cheesy Salsa Chicken Quesadilla Bake is a simple yet flavorful dish that brings together the best of Mexican-inspired comfort food. With its gooey cheese, savory chicken, and vibrant toppings, this dish is sure to please the whole family. Whether for a weeknight dinner or a weekend gathering, it promises a satisfying meal that everyone will enjoy.
So, gather your ingredients, follow the steps, and dive into this delightful quesadilla bake. You’ll find it’s not only a hit at the dinner table but also a fun and interactive dish that invites creativity and personalization. Enjoy every cheesy, flavorful bite!
