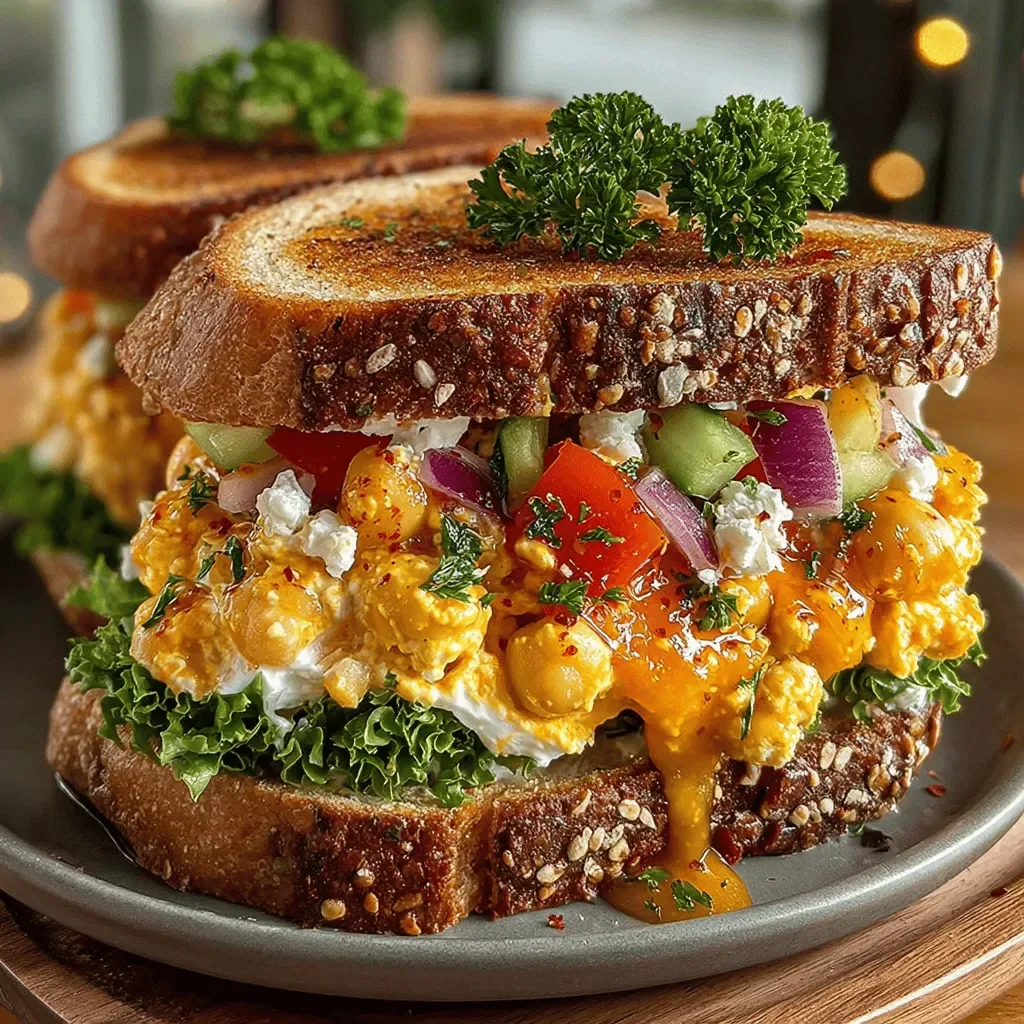
It was a crisp Saturday morning in late summer, the kind of day when the garden smells of fresh basil and the air hums with the promise of a barbecue. I was rummaging through my fridge, looking for something to turn the ordinary lunch into a celebration, when I spotted a handful of bright green jalapeños lounging beside a tub of cream cheese. The moment I lifted the lid, a cloud of tangy, buttery steam hit me, and I could almost hear the sizzle of bacon whispering in the background. That instant sparked a memory of my grandmother’s kitchen, where the simplest ingredients transformed into unforgettable comfort food, and I knew I had to create a sandwich that captured that magic.
Fast forward a few minutes, and I was slicing those jalapeños in half, carefully removing the seeds to tame the heat just enough for a wide audience while still preserving that signature kick. The creamy cheese mixture, a luscious blend of softened cream cheese and sharp cheddar, was waiting like a velvet blanket, ready to envelop each pepper half. As I folded the mixture into the jalapeños, the aroma of garlic powder and onion powder rose, mingling with the faint smokiness of the bacon I’d already crisped to perfection. The anticipation built with every bite-sized pocket, and I could already taste the crunchy, melty, spicy symphony that would soon grace a toasted slice of sourdough.
What makes this Jalapeño Popper Sandwich truly special is the marriage of textures: the crisp exterior of the grilled bread, the tender snap of the jalapeño, the creamy, cheesy filling, and the salty crunch of bacon all playing together. Imagine the first bite: the buttery crunch gives way to a molten center that oozes just enough heat to make your eyes twinkle, while the subtle tang of sourdough balances the richness. It’s the kind of sandwich that feels like a hug from your favorite aunt—comforting, familiar, yet with a surprise twist that keeps you coming back for more. And the best part? It’s quick enough for a weeknight dinner but impressive enough to wow guests at a casual get‑together.
But wait—there’s a secret trick in step four that will elevate the flavor profile from great to legendary, and I’ll spill the beans (or should I say, the jalapeños?) a little later. Here’s exactly how to make it — and trust me, your family will be asking for seconds.
🌟 Why This Recipe Works
- Flavor Depth: The combination of creamy cheese, smoky bacon, and the natural heat of jalapeños creates layers of flavor that develop with each bite, keeping your palate engaged from start to finish.
- Texture Harmony: The contrast between the crunchy toasted bread and the silky interior ensures a satisfying mouthfeel that prevents the sandwich from feeling one‑dimensional.
- Ease of Execution: With just a handful of pantry staples and a few simple steps, even novice cooks can assemble a restaurant‑quality sandwich without feeling overwhelmed.
- Time Efficiency: The entire process, from prep to plating, fits comfortably within a 45‑minute window, making it perfect for busy weekdays or relaxed weekends.
- Versatility: Whether you serve it as an appetizer, a light lunch, or a hearty dinner, the sandwich adapts to any meal setting with equal aplomb.
- Nutrition Balance: While indulgent, the recipe still offers a decent protein boost from the cheese and bacon, and you can tweak the cheese ratio for a lighter version.
- Ingredient Quality: Using fresh, high‑quality jalapeños and a good sourdough loaf amplifies the overall taste, proving that simple ingredients can shine when chosen wisely.
- Crowd‑Pleaser Factor: The bold flavors and eye‑catching presentation make it a guaranteed hit at parties, potlucks, or family gatherings.
🥗 Ingredients Breakdown
The Foundation
The backbone of this sandwich is the jalapeño itself. Fresh, large jalapeños provide a crisp bite and a bright, vegetal flavor that pairs beautifully with rich dairy. When selecting jalapeños, look for firm, glossy peppers with no soft spots; this ensures they’ll hold their shape during cooking. If you prefer a milder heat, you can opt for a mix of green and red jalapeños, which also adds a subtle sweetness. Remember, the seeds are the heat engine—remove them if you want a more family‑friendly version, but keep a pinch for that lingering warmth.
Aromatics & Spices
Garlic powder and onion powder are the unsung heroes that round out the flavor profile without overpowering the jalapeño’s natural zing. These dry spices dissolve into the cream cheese, distributing their savory depth evenly. For an extra aromatic boost, try a dash of smoked paprika, which adds a whisper of smokiness that mirrors the bacon’s flavor. Salt and pepper, of course, are essential for seasoning; they awaken the other ingredients and bring balance to the richness of the cheese.
The Secret Weapons
Cream cheese provides the silky, melt‑in‑your‑mouth base, while shredded cheddar contributes sharpness and a beautiful golden hue when the sandwich browns. The optional bacon isn’t just a garnish—it adds a salty crunch and a smoky undertone that elevates the entire dish. If you’re looking for a healthier spin, turkey bacon or even a plant‑based bacon crumble can be substituted without sacrificing texture. The cheese blend is flexible; feel free to experiment with pepper jack for an extra kick, or mozzarella for a milder melt.
Finishing Touches
The choice of bread is crucial. I love sourdough for its tangy crumb and sturdy structure, which holds the juicy filling without getting soggy. However, a hearty whole‑grain or a rustic ciabatta works just as well, especially if you’re aiming for a heartier bite. Butter for grilling isn’t just for flavor; it creates a barrier that prevents the bread from absorbing too much moisture, ensuring each slice stays crisp. Finally, a light drizzle of honey or a splash of lime juice after grilling can add a bright contrast that cuts through the richness.
With your ingredients prepped and ready, let's get cooking. Here's where the fun really begins...
🍳 Step-by-Step Instructions
-
Start by washing the jalapeños under cold water, then slice each pepper lengthwise to create four halves. Using a small spoon, gently scoop out the seeds and membranes, being careful not to tear the flesh. This step is where you control the heat level—more seeds mean more fire. Once cleaned, set the pepper halves aside on a paper towel to dry slightly, which helps the filling adhere better.
💡 Pro Tip: Lightly pat the jalapeño halves with a drizzle of olive oil before filling; this prevents them from sticking to the pan and adds a subtle sheen. -
In a medium bowl, combine the softened cream cheese, shredded cheddar, garlic powder, onion powder, and a pinch of salt and pepper. Using a rubber spatula, fold the mixture until it’s smooth and uniform, then sprinkle in the crumbled bacon if you’re using it. The cheese should be fluffy, not overly dense—this ensures a melt that’s both creamy and airy. Taste a small spoonful; adjust seasoning now because once the sandwich hits the pan, you won’t have a chance to fix it.
-
Spoon a generous dollop of the cheese mixture into each jalapeño half, spreading it to the edges so every bite gets an even hit of flavor. Press lightly with the back of the spoon to pack the filling in, but avoid over‑compressing, which can make the interior dry. Once all peppers are stuffed, set them on a tray—this is the moment when the anticipation builds, and the kitchen starts to smell like a cozy deli.
-
Heat a large skillet over medium‑high heat and add a thin layer of butter, swirling to coat the surface. When the butter foams and begins to turn golden, carefully place the stuffed jalapeño halves, cheese side up, onto the pan. Cover the skillet with a lid for about 2‑3 minutes; this traps steam and helps the cheese melt without burning the pepper walls. As the cheese bubbles and begins to turn a light amber, you’ll hear a gentle sizzle that signals it’s time for the next move.
⚠️ Common Mistake: Leaving the heat too high can scorch the cheese before it fully melts, resulting in a bitter aftertaste. -
While the cheese melts, lightly butter one side of each slice of sourdough bread. The buttered side will be the exterior that meets the skillet, creating that coveted golden crust. If you’re using a different bread, ensure it’s thick enough to hold the filling without falling apart. This step is where the sandwich gets its signature crunch, and the aroma of buttered bread begins to fill the kitchen.
-
Once the cheese is beautifully melted and the jalapeño skins are just tender, gently flip each pepper half to sear the outer side for an additional 30 seconds. This quick flip adds a subtle char that deepens the flavor without drying out the interior. Remove the peppers from the skillet and set them aside on a clean plate—don’t forget to keep the pan warm for the next stage.
-
Now, assemble the sandwich: place two jalapeño halves, cheese side down, onto the un‑buttered side of a bread slice, then top with the second slice, buttered side up. Press gently with a spatula to ensure the filling spreads evenly across the bread. If you’re feeling adventurous, add a thin layer of avocado or a drizzle of hot sauce for an extra dimension.
-
Return the assembled sandwich to the skillet, pressing down lightly with a weighted pan or a foil‑wrapped brick. Cook for 3‑4 minutes on each side, or until the bread is deep golden brown and the cheese inside is bubbling exuberantly. Listen for the faint crackle of the butter as it caramelizes—that’s the sound of flavor forming. Flip carefully using a wide spatula; the goal is a uniform crust, not a broken sandwich.
-
Remove the sandwich from the pan and let it rest for a minute; this allows the cheese to set just enough to avoid a messy spill when you slice it. Cut the sandwich diagonally for that classic, Instagram‑ready look, and watch the molten center ooze out in a slow, buttery river. Serve immediately, perhaps with a side of crisp pickle spears or a simple mixed green salad to balance the richness.
💡 Pro Tip: A quick spritz of lemon juice over the finished sandwich brightens the flavors and cuts through the richness.
And there you have it! But before you dig in, let me share some tips that will take this from great to absolutely unforgettable...
🔐 Expert Tips for Perfect Results
The Taste Test Trick
Before you commit to grilling, take a tiny spoonful of the cheese mixture and taste it. This simple step lets you adjust seasoning on the fly, adding a pinch more salt or a dash of extra pepper if needed. I once served this sandwich to a food‑critic friend who said the flavor was “almost perfect” until I added a whisper of smoked paprika—suddenly it became “mind‑blowing.” Trust your palate; it’s the most reliable gauge of success.
Why Resting Time Matters More Than You Think
After grilling the sandwich, let it sit for 60 seconds before slicing. This short rest lets the cheese settle, preventing it from spilling out the moment you cut into it. I learned this the hard way when a rushed bite sent cheese flying across the kitchen counter—turns out, patience truly is a virtue in sandwich making. The result? A clean, tidy slice that looks as good as it tastes.
The Seasoning Secret Pros Won’t Tell You
A pinch of flaky sea salt sprinkled on the buttered bread just before it hits the pan adds a subtle crunch and a burst of flavor that ordinary table salt can’t match. Chefs often keep this trick under wraps because it elevates even the simplest grilled sandwich to gourmet status. Sprinkle it lightly, and you’ll hear a faint “pop” as the salt meets the hot butter—an audible cue that you’re on the right track.
Bacon Crumble Timing
If you’re using bacon, cook it until it’s just crisp, then crumble while still warm. Warm bacon pieces melt slightly into the cheese, creating pockets of smoky goodness throughout the sandwich. I once over‑cooked the bacon, turning it into a hard brick that made the sandwich feel heavy; the lesson? Keep the bacon bite‑size and slightly pliable for the best texture.
The Butter‑Spread Method
Instead of melting butter in the pan, spread a thin, even layer directly onto the bread using a pastry brush. This ensures every corner of the slice gets a buttery kiss, resulting in an even golden crust. It also prevents the butter from pooling in one spot, which can cause uneven browning. The visual cue? A uniform sheen that turns a deep amber as the sandwich cooks.
🌈 Delicious Variations to Try
One of my favorite things about this recipe is how versatile it is. Here are some twists I've tried and loved:
Southwest Sunrise
Swap cheddar for pepper jack and add a spoonful of corn salsa into the cheese mixture. The result is a bright, slightly sweet crunch that pairs beautifully with the jalapeño’s heat, turning the sandwich into a mini fiesta on a plate.
Mediterranean Magic
Replace bacon with crumbled feta and incorporate chopped sun‑dried tomatoes into the filling. The salty feta and tangy tomatoes bring a Mediterranean flair, while the jalapeño adds a surprising kick that balances the briny notes.
Vegan Victory
Use a plant‑based cream cheese and vegan cheddar, and swap bacon for smoked tempeh strips. The texture remains satisfying, and the smoky tempeh provides the same depth without any animal products—perfect for a plant‑friendly crowd.
Sweet Heat Delight
Add a thin drizzle of honey or maple syrup over the cheese before grilling. The caramelized sweetness creates a beautiful contrast to the jalapeño’s heat, reminiscent of a spicy‑sweet glaze you’d find on a gourmet burger.
Herb‑Infused Bliss
Mix finely chopped fresh herbs—like cilantro, chives, or parsley—into the cheese blend. The herbs introduce a fresh, aromatic layer that brightens the overall profile, making each bite feel like a garden‑fresh experience.
Ultimate Crunch
Add a handful of toasted crushed tortilla chips to the cheese mixture. The chips stay crunchy even after grilling, delivering an unexpected textural surprise that turns the sandwich into a crunchy‑cheesy masterpiece.
📦 Storage & Reheating Tips
Refrigerator Storage
If you have leftovers, wrap each sandwich tightly in plastic wrap or place them in an airtight container. They’ll stay fresh for up to 2 days in the fridge. To keep the bread from becoming soggy, place a paper towel between the sandwich layers before sealing.
Freezing Instructions
For longer storage, individually wrap the sandwiches in freezer‑grade foil, then place them in a zip‑top bag. They freeze well for up to 1 month. When you’re ready to enjoy, thaw overnight in the refrigerator and reheat using the method below for best results.
Reheating Methods
The trick to reheating without drying it out? A splash of water in the pan and a gentle cover. Heat a skillet over medium, add a teaspoon of butter, then place the sandwich in and cover with a lid for 2‑3 minutes. The steam generated keeps the interior moist while the butter revives the crisp crust. Alternatively, a quick blast in a pre‑heated oven at 350°F for 5‑7 minutes restores the golden crunch.