
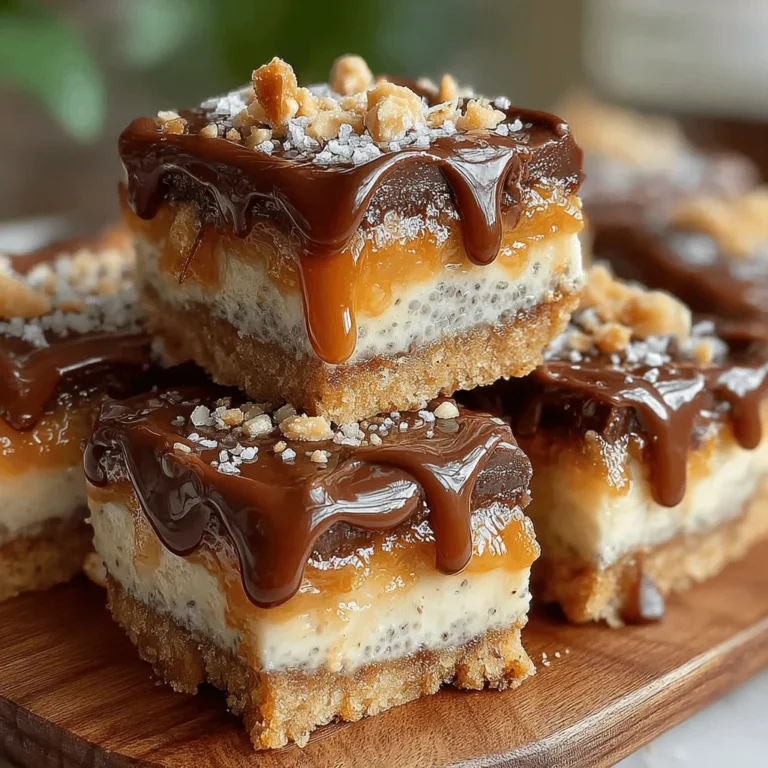
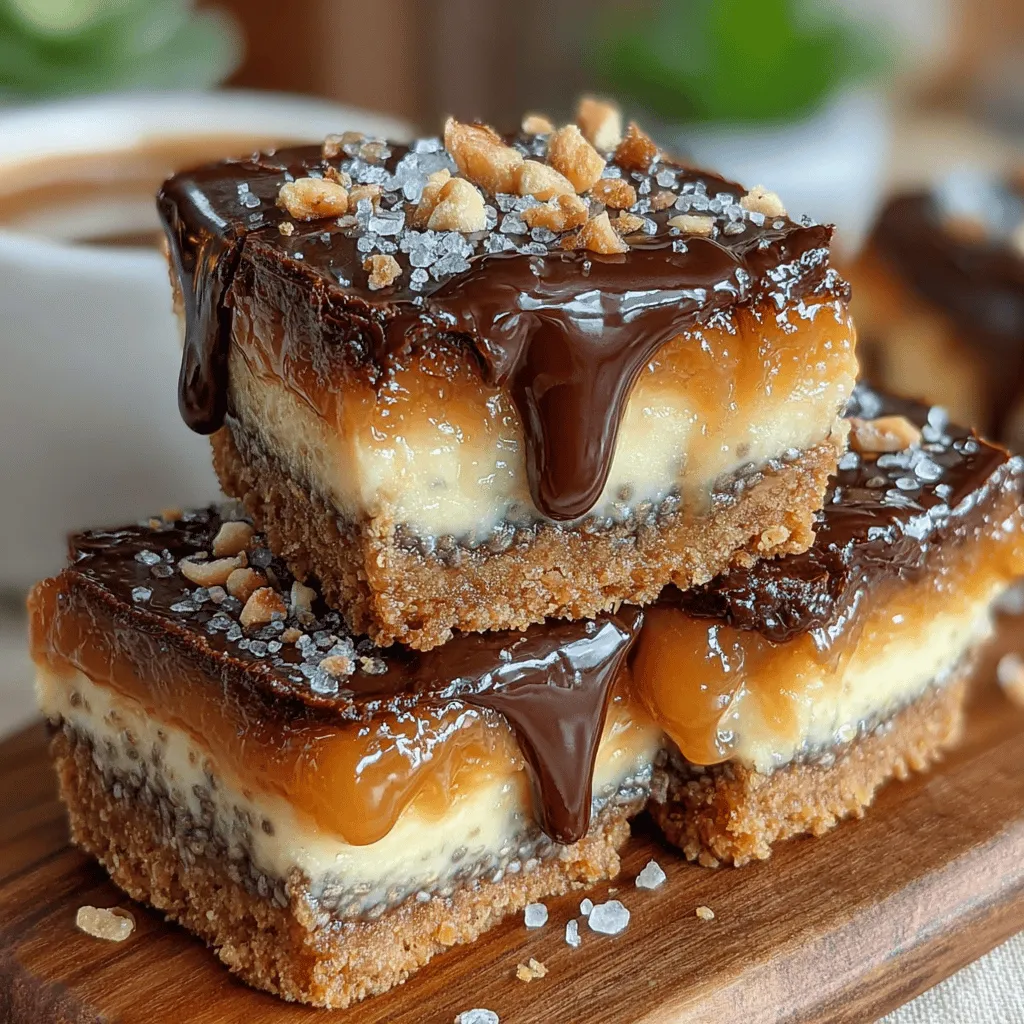
Introduction to Creamy Peanut Boost Chia Icebox Bars
In the world of nutritious snacks and desserts, the Creamy Peanut Boost Chia Icebox Bars stand out as a deliciously satisfying option. With their enticing blend of flavors and textures, these bars are not just a treat for the taste buds; they also pack a nutritional punch that makes them a smart choice for health-conscious individuals. Whether you’re looking for a post-workout snack, a mid-afternoon pick-me-up, or a sweet treat to indulge in without guilt, these icebox bars cater to a variety of dietary preferences, including vegan and gluten-free options.
What makes these bars particularly appealing is their seamless preparation process. Simply combine wholesome ingredients, freeze, and enjoy! The use of rolled oats, almond flour, chia seeds, and natural nut butter ensures that each bite delivers a rich source of protein, healthy fats, and dietary fiber. The versatility of these bars allows you to customize them to suit your taste—whether you prefer the rich nuttiness of peanut butter or the sweetness of honey, you can easily adjust the recipe to match your cravings.
Understanding the Ingredients
To fully appreciate the Creamy Peanut Boost Chia Icebox Bars, let’s explore the core components of this delightful recipe. Each ingredient plays a crucial role, contributing not only to the overall flavor but also to the health benefits that make these bars a guilt-free indulgence.
Description of the Base Ingredients
– Rolled Oats: One of the primary ingredients, rolled oats are known for their high fiber content, which aids in digestion and helps maintain a healthy heart. They provide a satisfying base that keeps you feeling full longer, making them an excellent choice for snacking. Additionally, oats are rich in antioxidants, which can help reduce inflammation and improve overall health.
– Almond Flour: Replacing traditional flour with almond flour offers several advantages. Almond flour is lower in carbohydrates and higher in protein, making it a perfect option for those looking to reduce their carb intake or follow a low-glycemic diet. It also brings a nutty flavor and moist texture to the bars, enhancing their overall appeal.
– Honey or Maple Syrup: Natural sweeteners like honey and maple syrup not only add sweetness but also come with their own health benefits. Honey is known for its antibacterial properties and ability to soothe the throat, while maple syrup contains antioxidants and essential minerals. Both options provide a healthier alternative to refined sugars, allowing you to enjoy the sweetness without the guilt.
– Unsweetened Peanut Butter: The star of the show, unsweetened peanut butter is packed with healthy fats and protein, contributing to the bars’ creamy texture and rich flavor. It’s a great source of energy and essential nutrients, including vitamin E, magnesium, and potassium. Using unsweetened versions ensures that you can control the sweetness level of your bars.
– Salt: While it may seem like a simple ingredient, salt plays an important role in balancing flavors. A pinch of salt enhances the sweetness of the bars and brings out the rich flavors of the other ingredients, making each bite more enjoyable.
Description of the Chia Filling Ingredients
– Chia Seeds: These tiny seeds are nutritional powerhouses that are loaded with omega-3 fatty acids, fiber, and antioxidants. Chia seeds are known for their ability to absorb liquid, forming a gel-like consistency, which helps bind the filling and gives the bars their creamy texture. They also support digestive health and provide a sustained energy release.
– Unsweetened Almond Milk: A dairy-free alternative to regular milk, unsweetened almond milk is low in calories and rich in vitamins, particularly vitamin E. It serves as a perfect base for the chia filling, ensuring a creamy consistency without adding excess sugar or calories.
– Honey or Maple Syrup: Just like in the base layer, these natural sweeteners can be used in the chia filling as well, allowing you to adjust the sweetness to your liking. They enhance the flavor of the chia mixture, making the bars even more enjoyable.
– Vanilla Extract: This aromatic ingredient acts as a flavor enhancer, adding a warm and inviting scent that elevates the overall taste of the bars. Vanilla extract not only complements the peanut flavor but also brings a touch of sweetness without additional sugar.
Overview of the Topping Ingredients
– Dark Chocolate Chips: Known for their health benefits, dark chocolate chips are a great way to add richness to the bars. They are lower in sugar than milk chocolate and contain antioxidants that can support heart health. Plus, they offer a delightful contrast to the creamy peanut layer.
– Coconut Oil: This versatile oil is often used in recipes for its numerous health benefits, including aiding in digestion and providing quick energy. When combined with chocolate, coconut oil helps to create a smooth and glossy finish, making the bars visually appealing.
– Crushed Peanuts: Adding crushed peanuts on top not only enhances the texture of the bars but also boosts the nutty flavor. They provide an additional crunch that contrasts beautifully with the creamy filling and chewy base, making each bite a delightful experience.
Step-by-Step Preparation Guide
Now that you have a solid understanding of the ingredients that make up the Creamy Peanut Boost Chia Icebox Bars, it’s time to dive into the preparation process. Creating these bars is straightforward and enjoyable, perfect for both novice and experienced cooks alike.
Creating the Base Layer
1. Gather Your Ingredients: Start by measuring out your rolled oats, almond flour, honey (or maple syrup), unsweetened peanut butter, and a pinch of salt.
2. Mix the Dry Ingredients: In a large mixing bowl, combine the rolled oats, almond flour, and salt. Stir them together until they are evenly mixed.
3. Incorporate the Wet Ingredients: Add the honey (or maple syrup) and unsweetened peanut butter to the dry ingredients. Using a spatula or your hands, mix everything together until it forms a cohesive dough. The mixture should be slightly sticky but hold together well.
4. Press the Mixture into the Baking Dish: Line a baking dish with parchment paper for easy removal. Transfer the oat mixture into the dish and press it down firmly using your hands or a flat-bottomed measuring cup. Ensure that the layer is evenly distributed across the bottom of the dish, creating a solid foundation for the bars.
5. Chill the Base Layer: Once pressed down, place the baking dish in the refrigerator for about 15-20 minutes. This step allows the base to firm up slightly, making it easier to add the chia filling later.
With the base layer prepared and chilling, you’re well on your way to creating these delicious Creamy Peanut Boost Chia Icebox Bars. Stay tuned for the next steps, where we will explore the chia filling and the delightful toppings that will make these bars a must-try recipe!
Tips on Achieving the Right Consistency for the Base
To ensure your base for the Creamy Peanut Boost Chia Icebox Bars has the perfect consistency, start by using the right balance of ingredients. The mixture should be moist enough to hold together when pressed into the pan but not so wet that it becomes soggy. Here are some tips to achieve the ideal consistency:
1. Measuring Ingredients: Use a kitchen scale for precision when measuring oats, nut butter, and sweeteners. Accuracy is key to achieving a firm base.
2. Mixing Technique: Combine the dry ingredients first—oats, protein powder, and any spices. Then, gradually incorporate the wet ingredients like peanut butter and maple syrup. This method helps to evenly distribute moisture throughout the mixture.
3. Consistency Check: As you mix, the mixture should form a cohesive dough that sticks together. If it feels too crumbly, add a teaspoon of nut milk or water at a time until the desired texture is reached.
4. Pressing Firmly: When transferring the mixture to the dish, press it down firmly with your hands or the back of a spatula. This will help create a solid base that will hold up when sliced.
Making the Chia Filling
Step-by-Step on Whisking and Allowing the Chia Seeds to Thicken
Creating the chia filling is a straightforward process that requires some patience but yields delicious results. Here’s how to do it:
1. Combine Ingredients: In a medium bowl, whisk together chia seeds, almond milk, vanilla extract, and maple syrup until the mixture is well combined.
2. Whisking Technique: It’s essential to whisk thoroughly to avoid clumps. Make sure the chia seeds are evenly distributed throughout the liquid. This will help them absorb moisture uniformly.
3. Allow to Thicken: Let the mixture sit for about 10 to 15 minutes. During this time, the chia seeds will absorb the liquid, swelling and creating a gel-like consistency. Stir the mixture a couple of times to ensure that no seeds settle at the bottom.
Importance of Timing and Technique
Timing is crucial when making the chia filling. If you allow the mixture to sit too long, it may become overly thick, making it difficult to spread. Conversely, if it’s not thick enough, it won’t hold its shape once poured over the base. This step is essential for achieving a creamy consistency that complements the crunchy base of the bars.
Layering the Components
Guidance on Pouring and Spreading the Filling Evenly Over the Base
Once your chia filling is ready, it’s time to layer it over the base. Follow these steps for even distribution:
1. Pour the Mixture: Gently pour the chia filling over the pressed base. Start from the center and work your way towards the edges. This helps to prevent the filling from overflowing on one side.
2. Spreading Technique: Use a spatula or the back of a spoon to spread the filling evenly. Ensure you reach all corners and edges of the base. A good tip is to tilt the dish slightly while spreading, allowing the filling to flow and fill gaps naturally.
Suggestions for Ensuring the Filling Reaches the Edges
To ensure that the filling adheres well to the edges, lightly tap the dish on the countertop after spreading. This action helps eliminate air bubbles and encourages the filling to settle into the corners.
Chilling Process
Explanation of the Necessity of Chilling and the Ideal Setting Time
Chilling your Creamy Peanut Boost Chia Icebox Bars is a crucial step that allows the chia filling to set properly. This process helps the bars hold their shape when sliced and enhances the flavor as all the ingredients meld together.
1. Chill Time: Place the layered bars in the refrigerator for at least 4 hours or overnight for best results. The longer they chill, the firmer they will become, leading to a better texture.
2. Covering the Dish: To prevent the bars from absorbing any odors from the fridge, cover the dish tightly with plastic wrap or a lid. This will also help maintain moisture levels.
Optional Chocolate Topping
Detailed Instructions on Melting Chocolate and Coconut Oil
For those looking to add an extra layer of flavor and richness, a chocolate topping is a delicious addition. Here’s how to prepare it:
1. Ingredients: You’ll need dark chocolate chips and coconut oil in a 1:1 ratio. For example, use ½ cup of each.
2. Melting Technique: In a microwave-safe bowl, combine the dark chocolate chips and coconut oil. Microwave in 30-second intervals, stirring between each until melted and smooth. Alternatively, you can melt them using a double boiler on the stove.
Techniques for Spreading the Topping Evenly and Garnishing with Crushed Peanuts
Once melted, pour the chocolate mixture over the chilled chia bars. Use a spatula to spread it evenly across the top. While the chocolate is still warm, sprinkle crushed peanuts on top for added crunch and presentation. This not only enhances the flavor but also makes the bars visually appealing.
Serving Suggestions and Enjoyment
When it comes to serving your Creamy Peanut Boost Chia Icebox Bars, presentation and pairing can elevate the experience:
1. Ideal Presentation Methods: Slice the bars into squares or rectangles for serving. Arrange them on a platter and drizzle with extra chocolate or a dollop of nut butter for an impressive look.
2. Suggestions for Pairing: Consider serving these bars with a glass of almond milk, a hot cup of coffee, or even a smoothie for a complete meal. You can also pair them with fresh fruits like bananas or berries for added nutrition.
3. Versatility: These bars are not just a delicious dessert; they also make for a quick breakfast option or an energizing snack. Their portability means you can easily take them on the go, making them perfect for busy mornings or afternoon pick-me-ups.
Nutritional Information
Understanding the nutritional profile of your Creamy Peanut Boost Chia Icebox Bars can help you make informed choices. Here’s a breakdown of the key nutrients per serving:
– Calories: Approximately 200 calories per bar
– Protein: 6 grams
– Fats: 10 grams (mainly from healthy fats in nut butter and coconut oil)
– Carbohydrates: 24 grams
Discussion on the Health Benefits
These bars are not only tasty but also packed with health benefits. Chia seeds are an excellent source of omega-3 fatty acids, fiber, and protein, promoting heart health and aiding digestion. The combination of peanut butter and dark chocolate offers a satisfying treat that can help curb cravings while providing essential nutrients. Regularly consuming these bars can contribute to a balanced diet and healthy lifestyle.
Conclusion
The Creamy Peanut Boost Chia Icebox Bars are not only delicious but also a versatile and nutritious snack option. With their rich flavors and satisfying textures, they fit seamlessly into various lifestyles, whether enjoyed as a quick breakfast, midday snack, or delightful dessert.
By following the steps outlined in this recipe, you can create a homemade treat that is both easy to prepare and full of wholesome ingredients. Embrace the joy of making your own snacks that are not only good for you but also incredibly tasty. So why not gather your ingredients today and experience the satisfaction of crafting these delightful bars for yourself? Enjoy the process, and relish in the delicious results!
