
Introduction to Tropical Kiwi Coconut Bliss Bars
Welcome to the refreshing and delightful world of Tropical Kiwi Coconut Bliss Bars, a treat that transports you straight to a sun-soaked beach with every bite. These blissful bars are a perfect fusion of vibrant tropical flavors, combining the tangy sweetness of fresh kiwis with the creamy richness of coconut milk. Not only are they a feast for the senses, but they also offer a multitude of health benefits, making them an ideal choice for a light dessert or a nutritious snack.
The beauty of this recipe lies in its simplicity. Made with wholesome ingredients, these bars cater to various dietary preferences, including vegan and gluten-free lifestyles. Whether you’re looking for a quick energy boost or a refreshing finish to your meal, Tropical Kiwi Coconut Bliss Bars are sure to delight your taste buds while nourishing your body.
The Allure of Tropical Flavors
Tropical flavors have a unique charm that evokes feelings of warmth, relaxation, and adventure. The key ingredients in our bliss bars—kiwis and coconut—are at the heart of this enchanting experience. Kiwis, with their vibrant green color and unique texture, are not only visually appealing but also packed with essential nutrients. These small fruits are a powerhouse of vitamin C, which supports immune health, and they are rich in dietary fiber that aids digestion. Their slightly tart flavor balances beautifully with the sweetness of the other ingredients, creating a harmonious blend that is both refreshing and satisfying.
Coconut milk, on the other hand, brings a luscious creaminess that enhances the overall indulgence of the bars. Unlike dairy, coconut milk is an excellent alternative for those who are lactose intolerant or following a plant-based diet. Its rich flavor profile adds depth to the bars, making them taste indulgent without compromising health. When combined with the tropical essence of kiwis, coconut milk transforms these bars into a delightful treat that you can enjoy guilt-free.
Key Ingredients Breakdown
To create the perfect Tropical Kiwi Coconut Bliss Bars, it’s essential to understand the role of each ingredient:
Kiwis
Kiwis are the star of this recipe, contributing not only their vibrant green color but also a wealth of health benefits. These fruits are abundant in vitamin C, which is vital for skin health and immune function. They also contain antioxidants and act as a natural digestive aid, thanks to their high fiber content. The unique sweet-tart flavor of kiwis elevates the overall taste of the bars, making them irresistibly refreshing.
Coconut Milk
Coconut milk is a crucial ingredient that provides the rich, creamy texture that makes these bars so indulgent. When selecting coconut milk, you’ll find both full-fat and light versions available. Full-fat coconut milk offers a luxurious creaminess that enhances the mouthfeel of the bars, while light coconut milk can be used for a lower-calorie option. For the best results, we recommend using full-fat coconut milk to achieve that perfect balance of richness and flavor.
Shredded Coconut
Unsweetened shredded coconut adds a delightful texture and a hint of tropical flavor to the bars. It provides a chewy consistency that contrasts beautifully with the creaminess of the coconut milk and the softness of the kiwis. In addition to its taste, shredded coconut is also a source of healthy fats, making it a fantastic addition to this nutritious treat.
Sweeteners
For sweetness, you can choose between honey and maple syrup, each offering its unique flavor profile. Honey adds a floral sweetness that complements the tropical ingredients, while maple syrup lends a subtle caramel note. Both options are natural sweeteners that can be adjusted according to your taste preferences. If you’re looking for a vegan alternative, maple syrup is an excellent choice.
Vanilla Extract
Adding vanilla extract enhances the overall flavor and aroma of the Tropical Kiwi Coconut Bliss Bars. Its warm, sweet notes provide a delightful contrast to the tartness of the kiwis and the richness of the coconut. A splash of vanilla elevates the bars from simple treats to gourmet delights.
Lime Juice
A squeeze of fresh lime juice introduces a refreshing acidity that balances the sweetness of the bars. The bright, zesty notes of lime not only enhance the flavor but also contribute to the overall tropical theme of the recipe. This small addition makes a significant impact, ensuring that each bite is bursting with freshness.
Sea Salt
Lastly, a pinch of sea salt plays a crucial role in elevating the flavors of the bars. Salt enhances sweetness and brings out the natural flavors of each ingredient, creating a more complex and satisfying taste experience. It’s a simple yet effective way to make your bliss bars truly unforgettable.
Step-by-Step Instructions for Blissful Bars
Now that we’ve explored the enticing elements that come together to create Tropical Kiwi Coconut Bliss Bars, let’s dive into the step-by-step instructions to make these delicious treats. The process is straightforward and can be completed in just a few easy steps, allowing you to enjoy a homemade dessert in no time.
1. Prepare the Ingredients: Begin by gathering all your ingredients. This includes ripe kiwis, full-fat coconut milk, unsweetened shredded coconut, your choice of sweetener (honey or maple syrup), vanilla extract, fresh lime juice, and sea salt.
2. Blend the Base: In a blender or food processor, combine the coconut milk, sweetener, vanilla extract, lime juice, and a pinch of sea salt. Blend until smooth and well mixed. This creamy base will be the foundation of your bliss bars.
3. Incorporate the Kiwis: Peel and chop the ripe kiwis, then add them to the blender. Pulse a few times to incorporate the kiwis into the mixture, ensuring that you retain some texture for added bite in the final bars.
4. Combine with Shredded Coconut: Transfer the mixture to a mixing bowl and stir in the unsweetened shredded coconut. This will give the bars their signature chewy texture and enhance the tropical flavor profile.
5. Set the Mixture: Line a baking dish with parchment paper for easy removal later. Pour the mixture into the dish, spreading it evenly to create a smooth layer. Tap the dish gently on the counter to remove any air bubbles.
6. Chill to Set: Place the baking dish in the refrigerator for at least 4 hours or until the mixture has firmly set. This step is crucial for achieving the right texture for your bliss bars.
By following these simple steps, you’re well on your way to creating your own Tropical Kiwi Coconut Bliss Bars. This delightful recipe not only satisfies your sweet tooth but also nourishes your body with wholesome ingredients. Stay tuned for the next part of the article, where we will explore creative serving suggestions and storage tips to help you enjoy these bars to the fullest.
Tropical Kiwi Coconut Bliss Bars are a delightful treat that combines the refreshing flavors of kiwi and coconut, creating a guilt-free indulgence that is both nutritious and delicious. In this section, we will guide you through the steps to prepare these blissful bars, from preparing your baking pan to serving suggestions that will elevate your experience.
Preparing the Pan
To ensure a successful baking experience, it’s crucial to properly prepare your baking dish. Start by selecting an 8×8-inch square baking pan, which is perfect for this recipe. Grease the pan lightly with coconut oil or cooking spray to prevent sticking. After greasing, line the pan with parchment paper, allowing some overhang on the sides. This will create easy “handles” to lift the bars out of the pan once they are set. Proper preparation of the pan not only ensures easy removal but also helps maintain the shape and integrity of the bars.
Blending the Kiwi
Next, it’s time to prepare the star ingredient—kiwi. For the perfect balance of flavor and texture, peel and chop the kiwis into smaller pieces. In a blender or food processor, blend the kiwi until smooth. However, if you prefer a bit of texture in your bars, consider reserving a few chunks of kiwi to fold in later. This technique adds a delightful chewiness to the final product, enhancing both the flavor and visual appeal of your Tropical Kiwi Coconut Bliss Bars.
Mixing the Base
Now that your kiwi is prepared, it’s time to focus on the coconut mixture that forms the base of your bars. In the same blender or food processor, combine shredded coconut, coconut cream, maple syrup, vanilla extract, and a pinch of salt. Blend these ingredients until you achieve a creamy, smooth consistency. The richness of the coconut cream is essential for a luscious texture, so don’t rush this step. If your mixture seems too thick, you can add a splash of coconut milk to achieve the desired creaminess.
Combining Mixtures
Once both the kiwi and coconut mixtures are ready, it’s time to combine them. Start by pouring the coconut base into a mixing bowl. Gently fold in the blended kiwi, using a spatula to incorporate it without overmixing. The goal is to have a harmonious blend of flavors, with the vibrant green kiwi speckling the creamy coconut base. This folding technique will ensure that your bars have a delightful texture and tasty pockets of kiwi throughout.
Pouring and Spreading
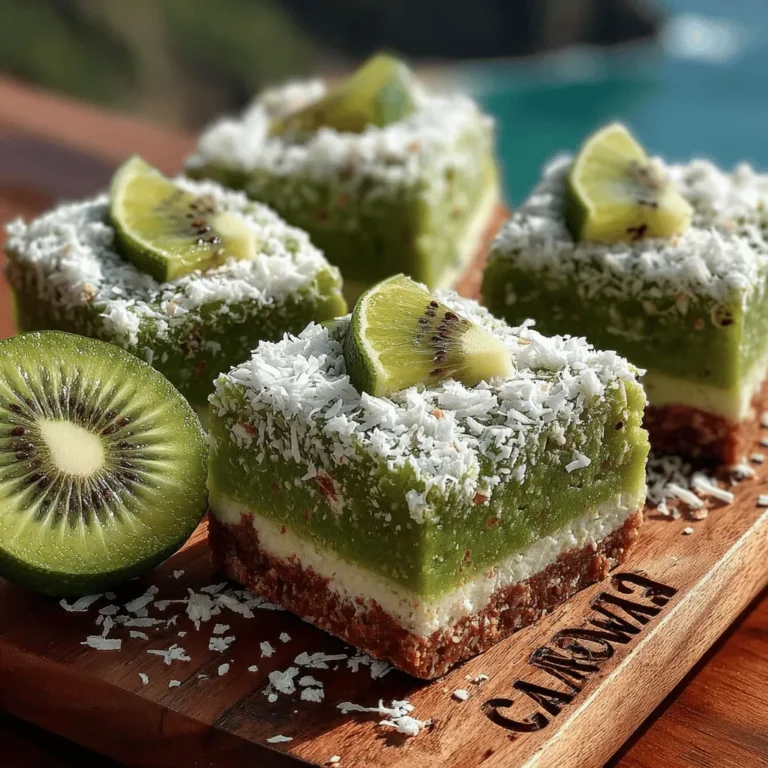
With your mixtures combined, it’s time to pour the mixture into your prepared baking pan. Use a spatula to evenly spread the mixture into the corners of the pan. A smooth top not only makes for better aesthetics but also ensures even freezing. To enhance the look and texture, sprinkle a generous layer of shredded coconut on top. This adds a lovely visual appeal and a hint of extra coconut flavor, making your bliss bars even more enticing.
Freezing Instructions
To achieve the perfect texture for your Tropical Kiwi Coconut Bliss Bars, freezing is a key step. Place the pan in the freezer for at least 2-3 hours or until the mixture is firm. For best results, cover the pan with plastic wrap or aluminum foil to prevent freezer burn and maintain freshness. Once frozen, you’ll find that the bars cut beautifully, making them an ideal treat for any occasion.
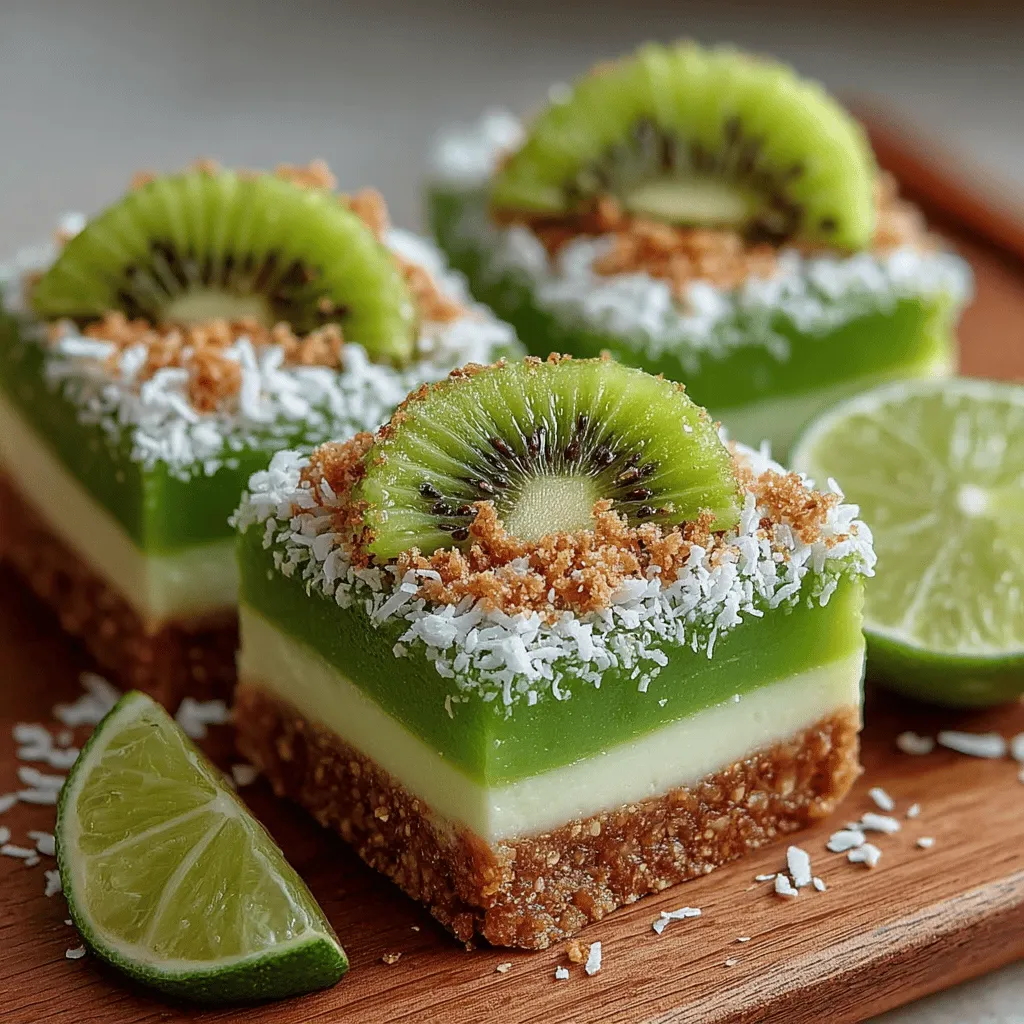
Slicing and Serving
After your bars have set, it’s time to slice and serve. To make slicing easier, let the pan sit at room temperature for about 5-10 minutes before cutting. Use a sharp knife to cut the bars into squares or rectangles, depending on your preference. For the perfect serving experience, enjoy these bars slightly chilled. They are refreshing and satisfying, making them an ideal snack for hot summer days or a light dessert after a meal.
Storage Tips
To maintain the freshness and flavor of your Tropical Kiwi Coconut Bliss Bars, store them in an airtight container in the refrigerator for up to one week. If you want to keep them longer, consider freezing individual bars wrapped in parchment paper and stored in a freezer-safe bag. This way, you can enjoy a tropical treat anytime without compromising on taste or texture.
Nutritional Benefits of Tropical Kiwi Coconut Bliss Bars
These bliss bars are not only delicious but also packed with nutritional benefits. Kiwis are rich in vitamin C, vitamin K, and dietary fiber, promoting immune function and digestive health. The coconut provides healthy fats that can contribute to energy and satiety, making these bars a great option for a quick snack. The natural sweetness from the maple syrup and the fruit ensures you’re not consuming refined sugars, making them suitable for various dietary lifestyles, including vegan and gluten-free options. Therefore, you can indulge in these bars guilt-free, knowing that they align with healthier choices.
Serving Suggestions and Pairings
To enhance your enjoyment of Tropical Kiwi Coconut Bliss Bars, consider these creative serving suggestions. Pair them with fresh fruit, such as sliced strawberries or a handful of blueberries, for a burst of color and flavor. A dollop of Greek yogurt or coconut yogurt on the side adds creaminess and protein, transforming your treat into a more substantial snack. For those who enjoy a touch of sweetness, a drizzle of honey or maple syrup can elevate the flavors beautifully.
These bliss bars also make a delightful addition to summer parties and picnics. They are portable, easy to share, and provide a refreshing burst of tropical flavor that guests will love. Whether served as a light dessert or a mid-afternoon snack, they are sure to impress.
Conclusion: Enjoying Your Tropical Kiwi Coconut Bliss Bars
Making and enjoying Tropical Kiwi Coconut Bliss Bars is a delightful experience that brings a slice of the tropics to your kitchen. They are easy to prepare, visually appealing, and packed with health benefits, making them a fantastic addition to any dessert repertoire. The combination of refreshing kiwi and creamy coconut creates a symphony of flavors that is hard to resist.
We encourage you to embrace the vibrant flavors and health benefits of this simple recipe. Whether you’re treating yourself or sharing with friends and family, these bliss bars are sure to become a favorite. So gather your ingredients, follow the steps, and enjoy your refreshing Tropical Kiwi Coconut Bliss Bars!
