
Introduction to Crispy Baked Chicken Tenders with Honey Mustard Delight
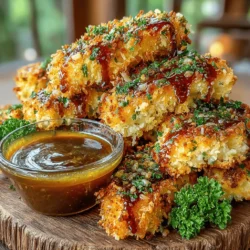
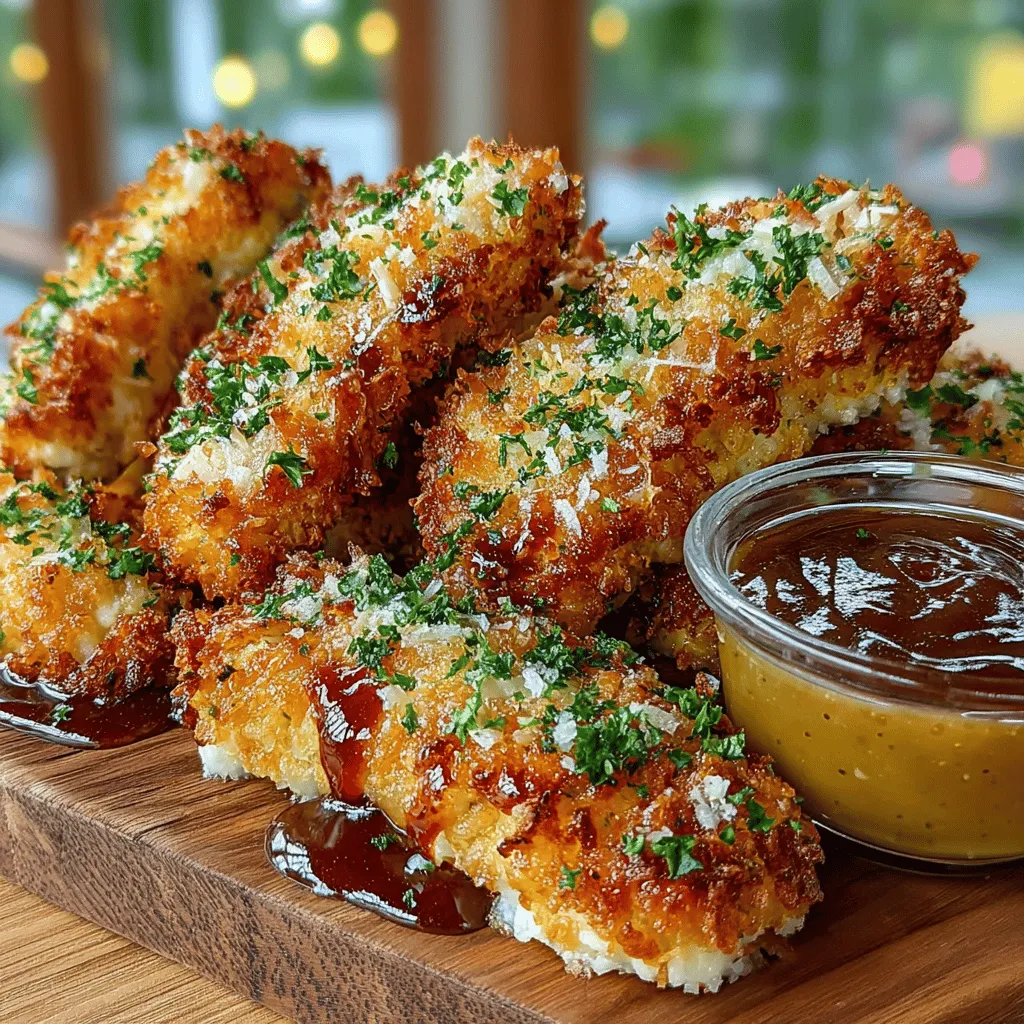
In the realm of comfort food, few dishes match the satisfying crunch and juicy flavor of chicken tenders. These versatile delights have captured the hearts and palates of many, making them a staple in households across the globe. Whether you’re preparing a cozy family dinner, hosting a lively game night, or simply indulging in a personal treat, crispy baked chicken tenders are sure to impress. What sets this recipe apart is its accompanying homemade honey mustard dipping sauce, a delightful twist that elevates this classic dish to new heights. In this article, we will guide you through the steps to create these delicious tenders, from marination to baking, ensuring you achieve the perfect balance of flavors and textures that everyone will rave about.
Understanding the Ingredients for Crispy Baked Chicken Tenders
To create the ultimate crispy baked chicken tenders, it’s essential to understand the role each ingredient plays in the recipe. The combination of quality chicken, a well-crafted seasoning blend, a crispy coating, and a flavorful dipping sauce is what makes this dish truly memorable.
The Chicken: The Star Ingredient
When it comes to the base of your chicken tenders, boneless, skinless chicken breasts are the ideal choice. This cut of meat not only allows for ease of preparation but also ensures tenderness and juiciness in every bite. Chicken breasts are naturally lean, making them a healthier option compared to other cuts, and they readily absorb flavors from marinades, enhancing the overall taste of your dish.
One of the critical steps in preparing chicken tenders is marination, particularly in buttermilk. Soaking the chicken in buttermilk serves multiple purposes: it infuses the meat with flavor, helps break down proteins for tenderness, and retains moisture during baking. The result is perfectly juicy chicken tenders that are both flavorful and satisfying.
The Seasoning Blend: Flavor Profiles
A well-seasoned chicken tender is crucial for achieving that delicious, mouth-watering flavor. In this recipe, we utilize a blend of garlic powder, onion powder, paprika, salt, and pepper. Each of these spices contributes to enhancing the chicken’s natural flavor while adding depth to the dish.
Garlic powder and onion powder provide a savory aroma and rich taste, while paprika brings a mild heat and vibrant color to the mix. The salt and pepper are essential for balancing flavors and enhancing the overall profile of the dish. By combining these spices in the marinade, you create a harmonious blend that seeps into the chicken, ensuring every bite is packed with flavor.
The Coating: Crunch and Texture
The coating is what transforms simple chicken strips into crispy baked tenders. For this recipe, we recommend using seasoned breadcrumbs, particularly panko, which are larger and lighter than traditional breadcrumbs, resulting in a superior crunch. Panko is known for its airy texture, which creates a delightful crunch when baked, ensuring your chicken tenders have that sought-after crispy exterior.
In addition to breadcrumbs, we incorporate Parmesan cheese and dried oregano into the coating mix. The Parmesan cheese adds a rich, nutty flavor that complements the chicken beautifully, while the dried oregano lends an aromatic, herbaceous note. This combination not only enhances the taste but also contributes to the overall sensory experience of enjoying these tenders.
The Dipping Sauce: Sweet Meets Savory
No chicken tender experience is complete without a dipping sauce, and our honey mustard sauce is the perfect accompaniment. This sauce combines the sweetness of honey with the tanginess of mustard, creating a delightful balance that enhances the flavor of the chicken.
To make the honey mustard sauce, you’ll need just a few simple ingredients: honey, Dijon mustard, and a touch of apple cider vinegar for an extra zing. The sweetness from the honey complements the savory notes of the chicken, while the mustard adds a tangy kick that brightens the dish. Additionally, this sauce is versatile and can be easily customized to suit individual taste preferences—add more honey for sweetness, or adjust the mustard for an extra punch.
Step-by-Step Preparation of Crispy Baked Chicken Tenders
Armed with a clear understanding of the ingredients, you’re ready to dive into the preparation of your crispy baked chicken tenders. The first crucial step is marinating the chicken, which sets the foundation for achieving ultimate tenderness.
Marinating the Chicken for Ultimate Tenderness
To prepare the marinade, you will need buttermilk, along with the seasoning blend of garlic powder, onion powder, paprika, salt, and pepper. Start by placing your chicken strips in a large bowl or a resealable plastic bag. Pour enough buttermilk over the chicken to fully submerge it, ensuring that every piece is well-coated. Next, sprinkle in the seasoning blend, mixing well to ensure all the chicken is evenly seasoned.
Allow the chicken to marinate for at least 30 minutes, although for optimal results, consider marinating for several hours or even overnight. This extended marination time allows the flavors to penetrate deeper into the meat while ensuring maximum moisture retention during baking.
Preheating the Oven for Perfect Baking
While the chicken is marinating, it’s important to prepare your baking environment. Preheat your oven to 400°F (200°C). A hot oven is key to achieving that crispy exterior while keeping the inside juicy. You may also want to line a baking sheet with parchment paper or lightly grease it to prevent sticking and ensure even cooking.
By understanding the significance of each ingredient and following these initial steps, you’re well on your way to creating an unforgettable dish that’s sure to be a hit at any gathering. In the following sections, we will delve deeper into the coating process, baking, and serving suggestions for your crispy baked chicken tenders with honey mustard delight.
Importance of Preheating for Crispy Texture
Preheating your oven is a crucial step in achieving the perfect crispy texture for your baked chicken tenders. When the oven is preheated, it ensures that the chicken starts cooking immediately upon entering the oven, which helps set the outside layer quickly. This rapid cooking process locks in moisture while allowing the exterior to crisp up beautifully. Without preheating, the chicken could spend too much time in a lukewarm environment, resulting in a soggy texture instead of the desired crunch. Aim to preheat your oven to 425°F (220°C) for optimal results.
Benefits of Using a Wire Rack on a Baking Sheet
Using a wire rack placed on top of a baking sheet elevates your chicken tenders off the surface, allowing for better airflow around each piece. This technique promotes even cooking from all sides and helps excess moisture escape, which is essential for achieving that coveted crispy finish. Additionally, the wire rack prevents the chicken tenders from sitting in their juices as they bake, thus preventing them from becoming soggy. Investing in a quality wire rack can make a significant difference in the overall texture and taste of your baked chicken tenders.
Preparing the Coating: The Perfect Crunch
Step-by-Step Guide to Mixing the Breadcrumb Coating
Creating the perfect coating for your chicken tenders is key to achieving that satisfying crunch. Here’s how to do it effectively:
1. Gather Your Ingredients: You will need panko breadcrumbs, grated Parmesan cheese, garlic powder, onion powder, paprika, salt, and pepper. The combination of panko and Parmesan adds both flavor and texture.
2. Mix the Dry Ingredients: In a large mixing bowl, combine 1 cup of panko breadcrumbs, ¼ cup of grated Parmesan cheese, 1 teaspoon of garlic powder, 1 teaspoon of onion powder, ½ teaspoon of paprika, and ½ teaspoon of salt and pepper. Use a whisk to ensure even distribution of the spices and cheese.
3. Set Up a Breading Station: Prepare three shallow bowls – one for flour, one for beaten eggs, and the third for your breadcrumb mixture. This setup will streamline the coating process.
Tips for an Even Coating on Chicken Strips
To ensure an even coating on your chicken strips, follow these tips:
– Dredge in Flour First: Lightly coat each chicken tender in flour before dipping it in the egg wash. This creates a dry surface that helps the egg adhere better, resulting in a more even breadcrumb coating.
– Use Your Hands: When transferring the chicken from the egg wash to the breadcrumb mixture, use one hand for wet ingredients and the other for dry. This technique prevents your fingers from becoming overly sticky from the egg and breadcrumbs.
– Press Firmly: After placing the chicken in the breadcrumb mixture, gently press down to ensure the crumbs adhere well. This step is crucial for achieving a thick, crunchy coating.
Baking to Golden Perfection
Proper Placement on the Wire Rack
Once coated, it’s time to arrange your chicken tenders on the wire rack. Here’s how:
1. Space Them Out: Place the chicken tenders in a single layer on the wire rack, ensuring there’s enough space between each piece. This allows hot air to circulate freely, promoting even cooking and crispiness.
2. Avoid Overcrowding: If you have many tenders, it’s better to bake them in batches rather than crowding them all on one rack. Overcrowding can trap steam, leading to soggy tenders.
Importance of Spraying or Brushing with Olive Oil or Melted Butter
To achieve that golden-brown finish, it’s essential to spray or lightly brush the chicken tenders with either olive oil or melted butter before baking. This step not only enhances flavor but also aids in browning and crisping the coating. A light coating will suffice; you don’t want to saturate the breading, which could negate the crispy effect.
Baking Time and Temperature Guidelines
Bake your chicken tenders in the preheated oven at 425°F (220°C) for about 15-20 minutes. Here are specific guidelines to ensure optimal results:
– Check for Doneness: Flip the tenders halfway through the baking time, around the 10-minute mark, to promote even browning. The chicken should reach an internal temperature of 165°F (74°C) when fully cooked.
– Look for Crispiness: The tenders are done when they are golden brown and crispy on the outside. If you desire additional crispiness, you can broil them for 1-2 minutes at the end of the baking time, but keep a close eye to avoid burning.
Crafting the Honey Mustard Dipping Sauce
Simple Steps to Whisk Together the Sauce Ingredients
Creating a delicious honey mustard dipping sauce is quick and easy. Here’s how to whip it up:
1. Combine Ingredients: In a small bowl, mix together ½ cup of Dijon mustard, ¼ cup of honey, and 1 tablespoon of apple cider vinegar. The vinegar adds a tangy kick that balances the sweetness of the honey.
2. Whisk Until Smooth: Using a whisk, blend the ingredients until they are well incorporated and smooth. Adjust the consistency by adding a little more honey if you prefer a sweeter sauce or more mustard for additional tang.
3. Taste and Adjust: Before serving, taste the sauce and adjust the sweetness and tanginess according to your preference. You can add a pinch of salt or a dash of hot sauce for an extra kick.
Serving Suggestions for Baked Chicken Tenders
Presentation Ideas for an Enticing Meal
When it comes to serving your crispy baked chicken tenders, presentation can elevate the dining experience. Here are some tips:
– Plate the Tenders Neatly: Arrange the chicken tenders on a large serving platter or individual plates. You can fan them out or stack them for a more appealing look.
– Serve with Dipping Sauce: Place the honey mustard sauce in a small bowl in the center of the platter or alongside the chicken tenders. This not only looks inviting but also makes it easy for guests to dip as they please.
– Garnish with Fresh Herbs: For a pop of color, garnish the dish with fresh parsley or chives. A sprinkle of herbs enhances the visual appeal and adds a fresh flavor.
Suggestions for Side Dishes
To create a balanced meal, consider pairing your chicken tenders with light and refreshing side dishes. Here are some ideas:
– Crisp Green Salad: A simple mixed greens salad with a light vinaigrette complements the richness of the chicken tenders perfectly.
– Vegetable Sticks: Fresh vegetable sticks such as carrots, celery, or bell peppers add crunch and a refreshing contrast to the meal.
– Sweet Potato Fries: For a twist on the classic pairing, serve your chicken tenders with baked sweet potato fries, which bring a hint of sweetness that pairs beautifully with the honey mustard sauce.
Pairing Beverages with Your Dish
When enjoying crispy baked chicken tenders, choosing the right beverage can enhance your meal. Here are some pairing recommendations:
– Refreshing Lemonade: A chilled glass of homemade lemonade provides a tangy contrast that complements the sweetness of the honey mustard sauce.
– Iced Tea: Unsweetened iced tea with a slice of lemon is another excellent choice for a refreshing and slightly bitter counterbalance.
– Craft Beer: If you prefer an alcoholic option, a light lager or a citrus-infused pale ale pairs well with the crispy texture and flavor of the chicken tenders.
Conclusion: Enjoying Your Crispy Baked Chicken Tenders with Honey Mustard Delight
In summary, crispy baked chicken tenders with honey mustard dipping sauce are not only easy to prepare but also a delightful dish that caters to both children and adults alike. The combination of tender, flavorful chicken enveloped in a crunchy coating paired with a sweet and tangy sauce creates an irresistible culinary experience. As you explore this recipe, take the time to savor each step, ensuring that your meal is not just about nourishment but also about enjoyment and satisfaction. With this guide, you are well on your way to impressing family and friends with your cooking skills, all while enjoying the deliciousness of homemade comfort food. So gather your ingredients, follow the steps, and relish the joy of creating this delightful dish that’s sure to become a family favorite.